11 Microservices CI/CD Pipeline: E-Commerce Project EKS

DevOps | Cloud Practitioner | AWS | GIT | Kubernetes | Terraform | ArgoCD | Gitlab
Each microservice in this project will build/trigger separately. Automatically the pipeline will be triggered. Multibranch pipeline - created (Automated). Push any changes in GitHub repo the pipeline will be triggered.
Introduction
We’ll be working on an amazing microservices-based project with 11 different microservice components. Each component will be built separately and automated completely.
Key Highlights of the Project
✅ Microservices Architecture – 11 microservices handling different functionalities
✅ GitHub Integration – Source code for each microservice is in a dedicated branch
✅ Jenkins Multi-Branch Pipeline – Automating builds and deployments
✅ EKS Deployment – Running the project on AWS EKS
✅ Real-Time Automation – Automatic pipeline trigger on code push
If you liked the work, you could buy a coffee
Check out LinkedIn post here
Understanding Microservices Architecture
1. Overview of the Application
Let’s assume we are working on an eCommerce application with different functionalities:
🔹 Email Service – Sends notifications when a user makes a purchase
🔹 Cart Service – Manages shopping cart functionality
🔹 Shipping Service – Handles shipping details and address management
🔹 Frontend UI – Displays all components in a user-friendly interface
🔹 Payment Service – Handles payment processing
Each of these functionalities is managed by a separate microservice to ensure scalability, modularity, and flexibility.
2. Why Microservices?
Independent Deployment – We can modify and deploy a single microservice without affecting others.
Scalability – Each microservice can be scaled independently based on demand.
Fault Isolation – If one service fails, the rest of the application remains unaffected.
For example, if we need to modify the Email Service, we can update the respective source code, build, and deploy it without affecting the other 10 microservices.
Setting Up Jenkins Multi-Branch Pipeline
1. Why Multi-Branch Pipeline?
Since we have 11 microservices, manually creating separate pipelines can be tedious. Instead, we’ll use a Jenkins Multi-Branch Pipeline, which will:
✅ Automatically detect branches in the GitHub repository
✅ Trigger builds only when there is a change in a specific branch
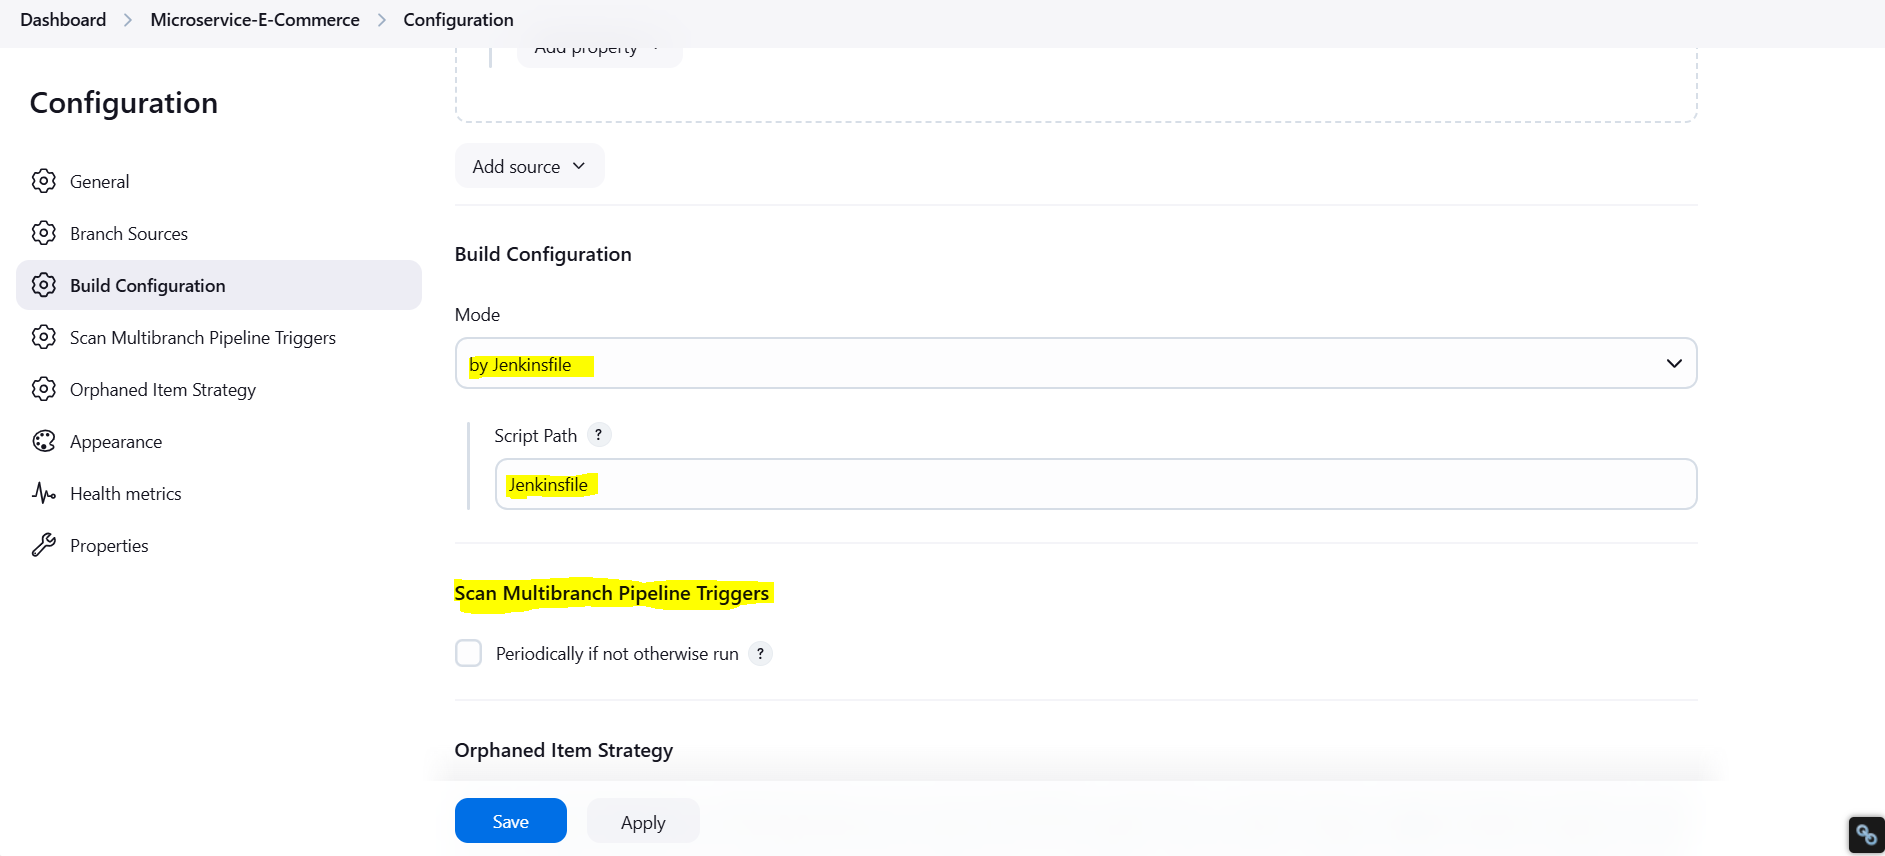
✅ Use Jenkinsfile in each branch to define CI/CD steps
2. How Does Automation Work?
Each microservice has its own branch in GitHub.
A Jenkinsfile is placed in each branch.
Multi-Branch Webhook Trigger is configured.
Any code push to a branch automatically triggers the pipeline for that specific microservice.
The pipeline builds and deploys the updated microservice without affecting others.
Create a EC2 machine as Server
We will use this server to provision the EKS Cluster and we will run the Jenkins on the same server to reduce time.
Create an EC2 machine with t2.large with 20 GB EBS
Setting Up AWS EKS Cluster
1. Infrastructure Setup Branch
We have two additional branches in our repository:
Infra-Setup Branch – Contains scripts to set up an EKS Cluster on AWS.
Main Branch – Contains Kubernetes YAML files to deploy the application.
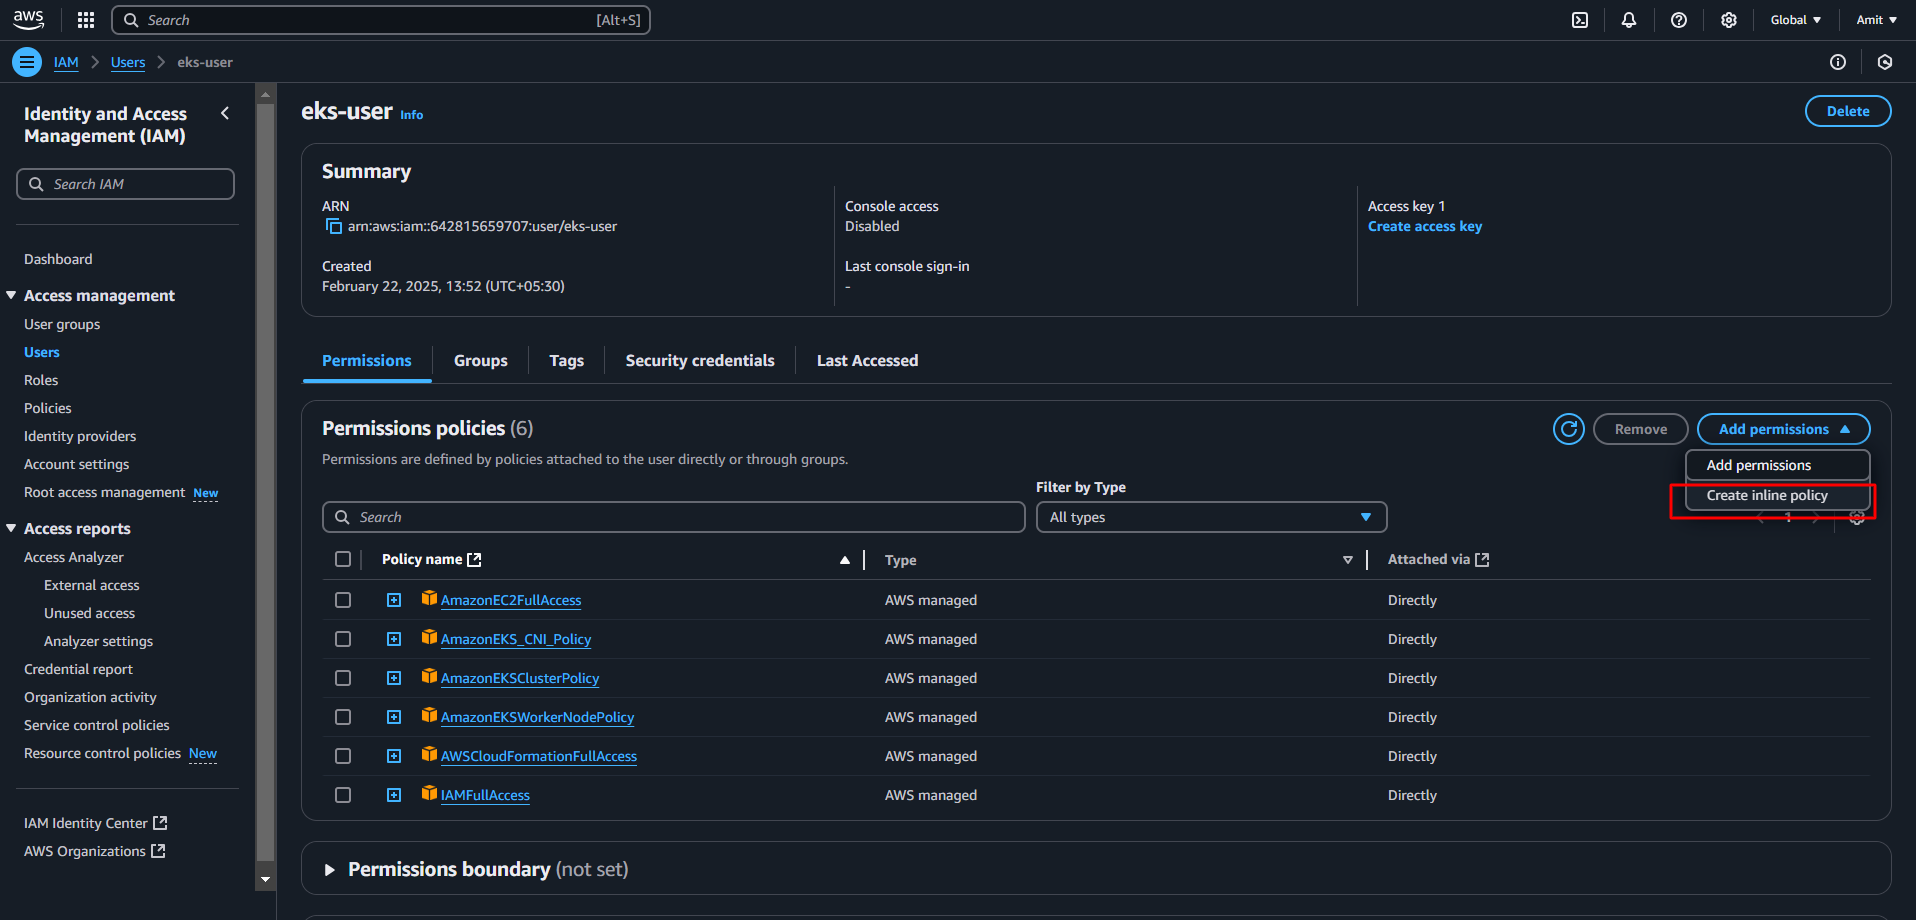
2. Creating an AWS User for EKS
To create and manage the EKS cluster, we need an AWS IAM user = eks-user with the following permissions:
✔️ AmazonEKSClusterPolicy
✔️ AmazonEKSServicePolicy
✔️ AmazonEC2FullAccess
✔️ AmazonS3FullAccess
✔️ IAMFullAccess
✔️ AmazonVPCFullAccess
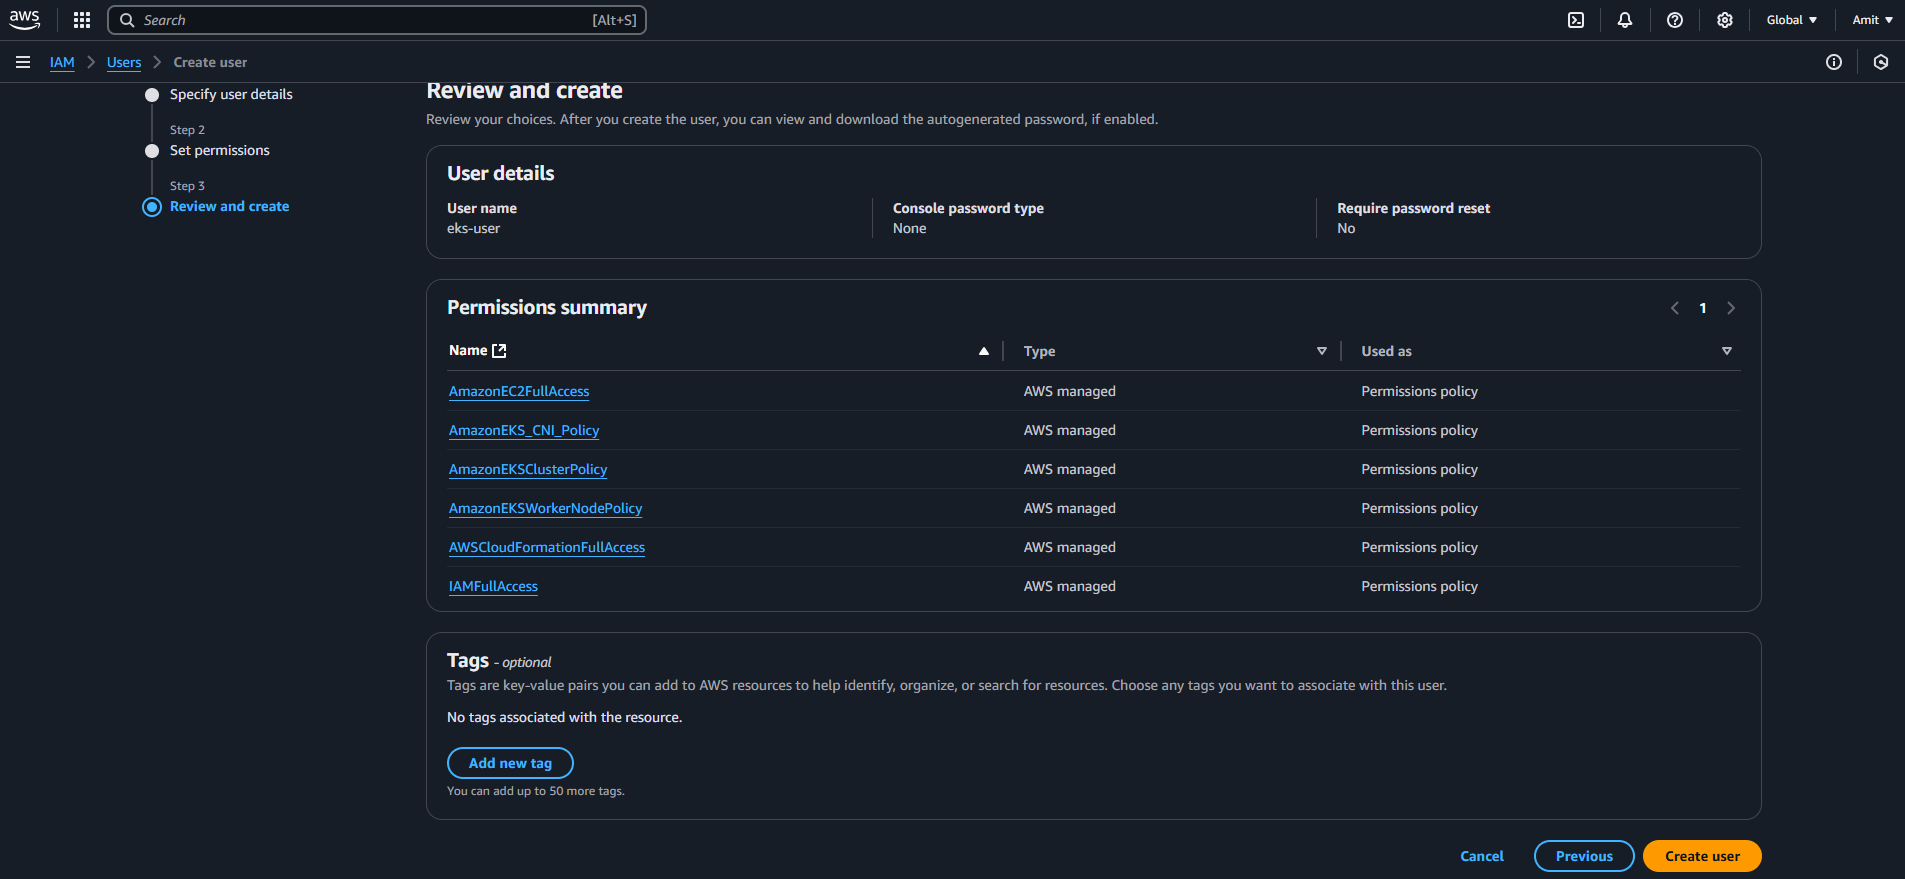
After creating user, we will attach inline policy with user
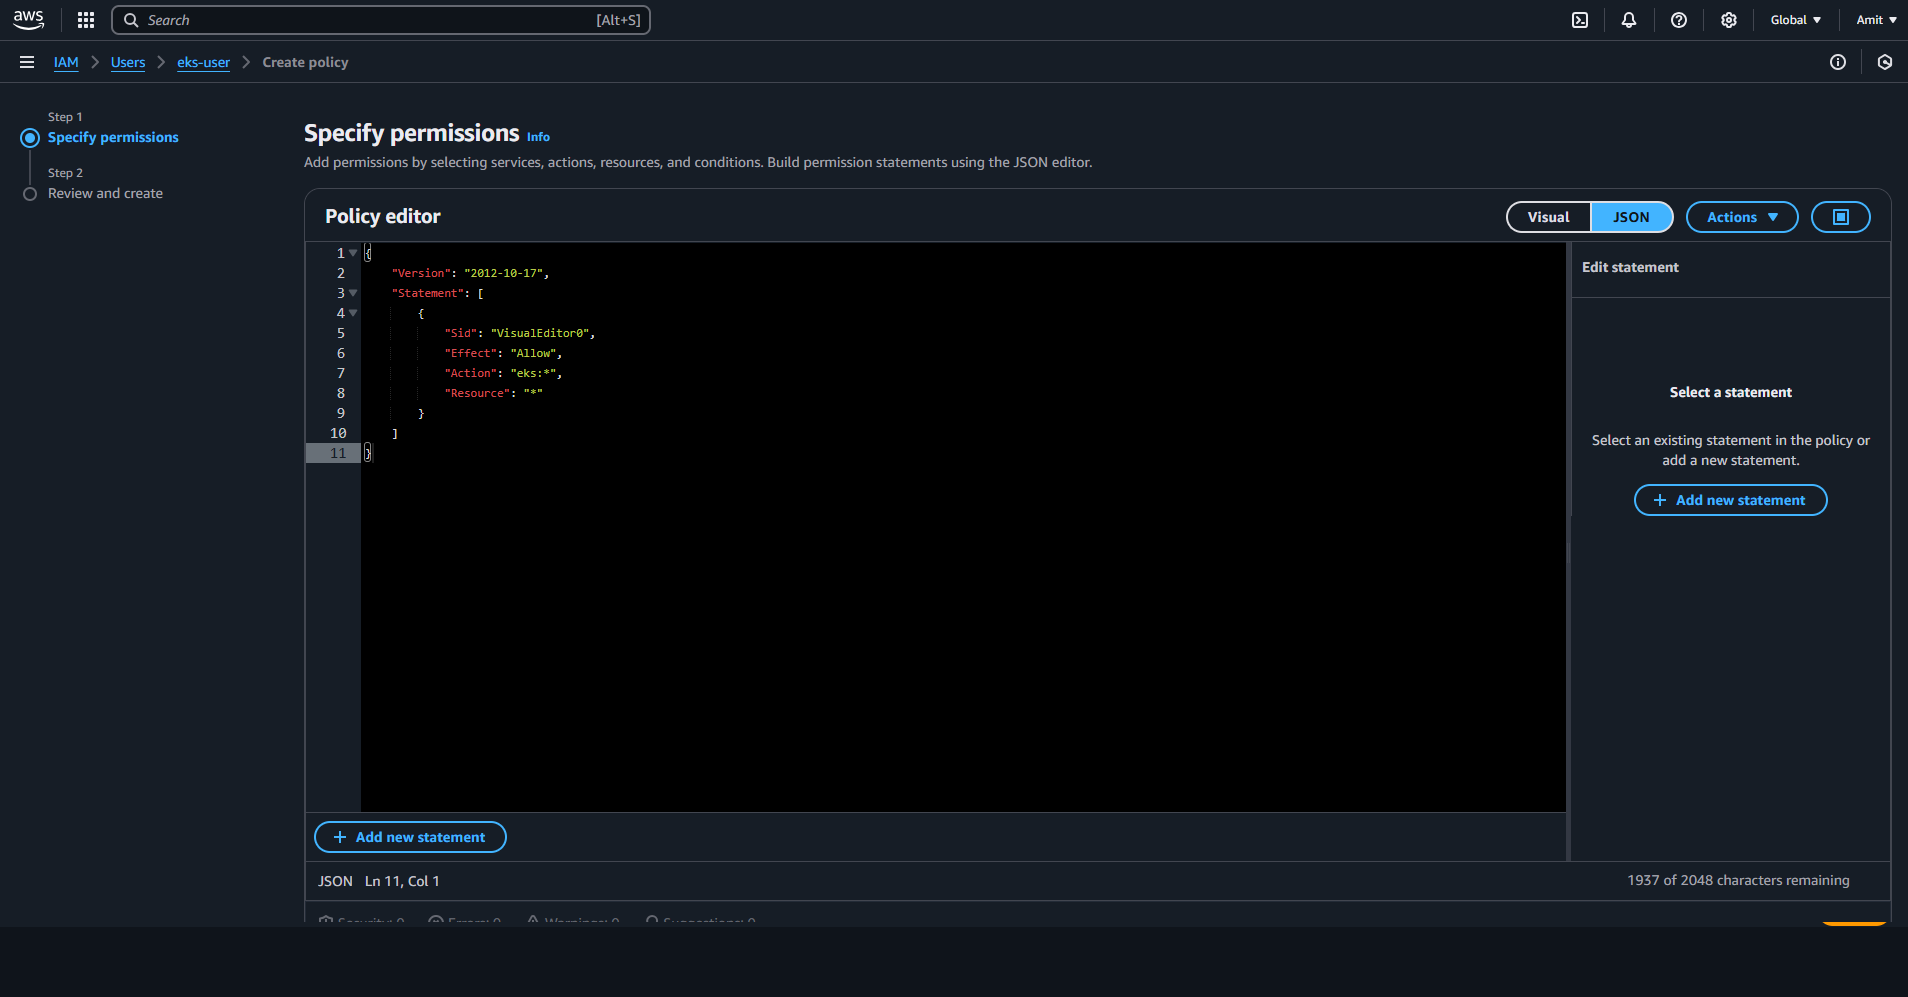

Done with “Security Credentials” , we will create an “access key”
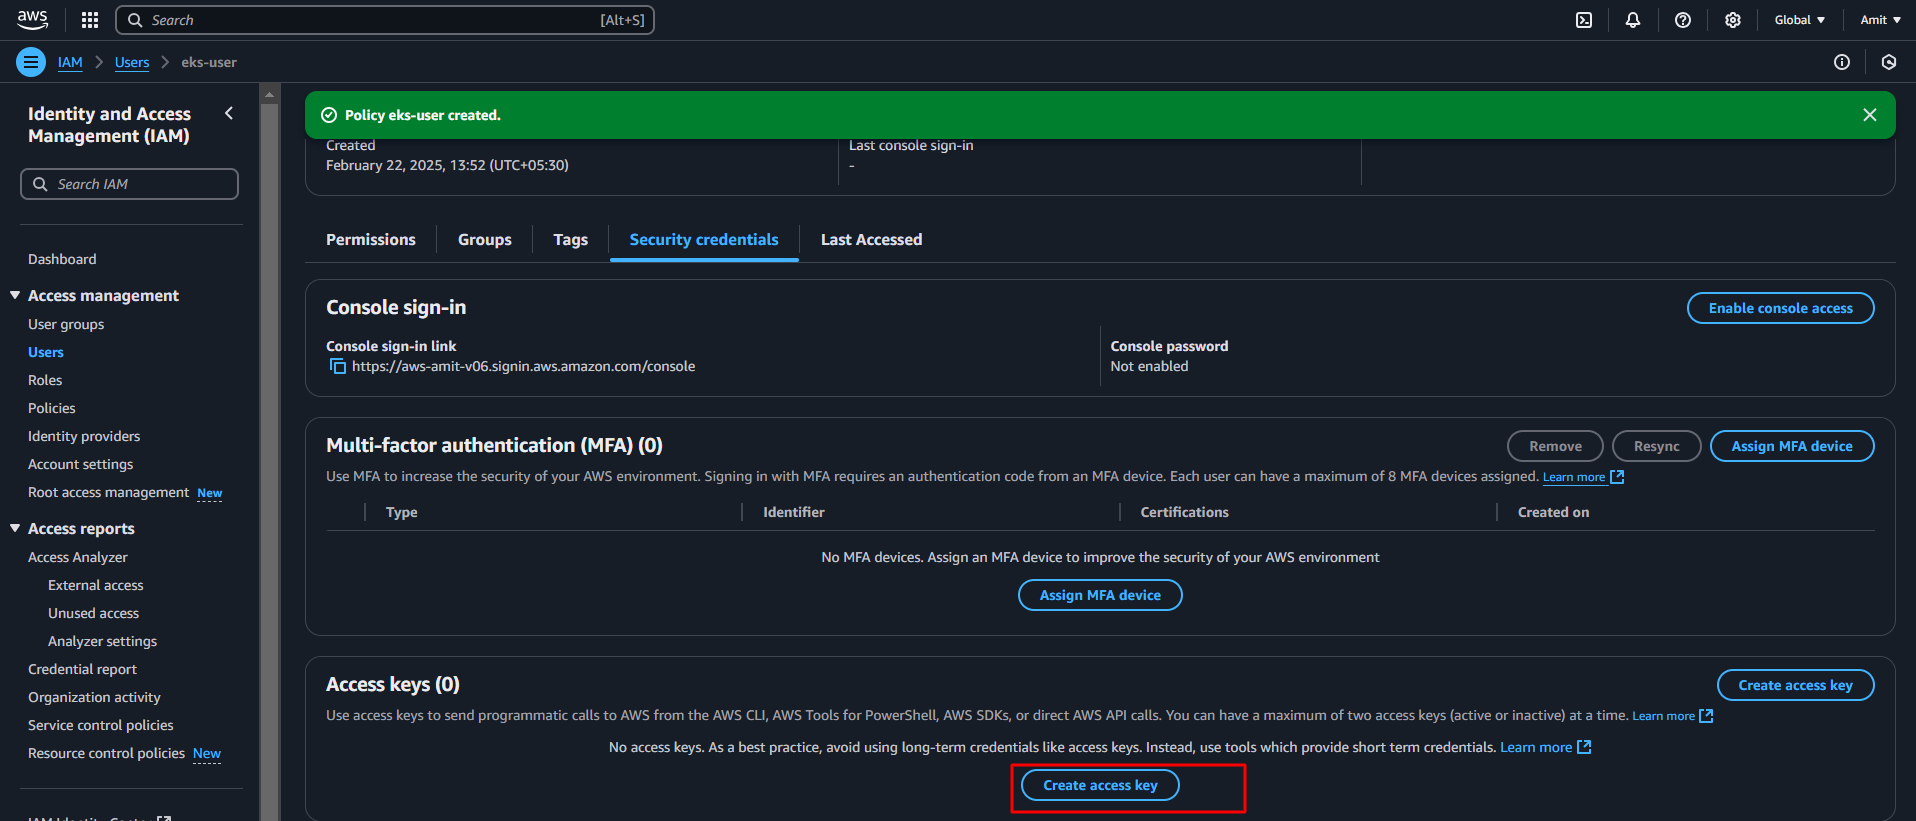
This “access key” will used to authenticate our VM with AWS account = to create EKS Cluster
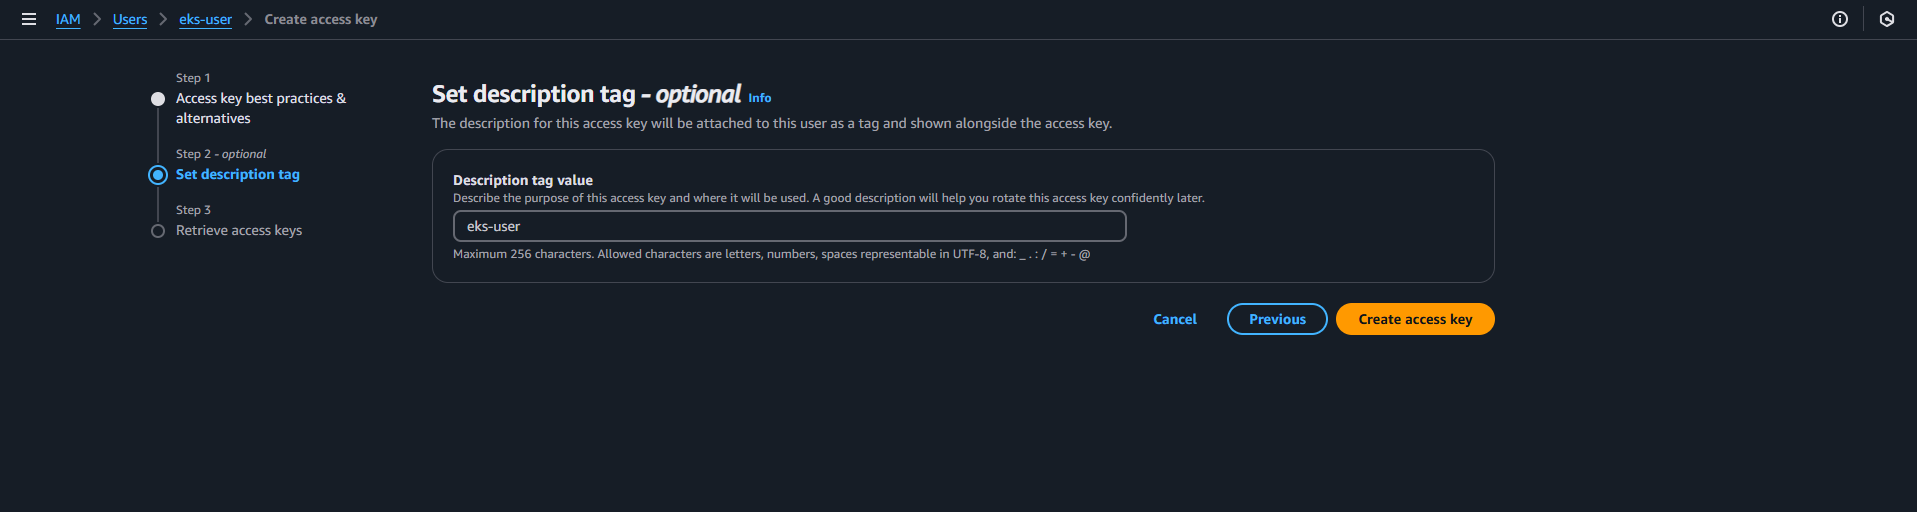
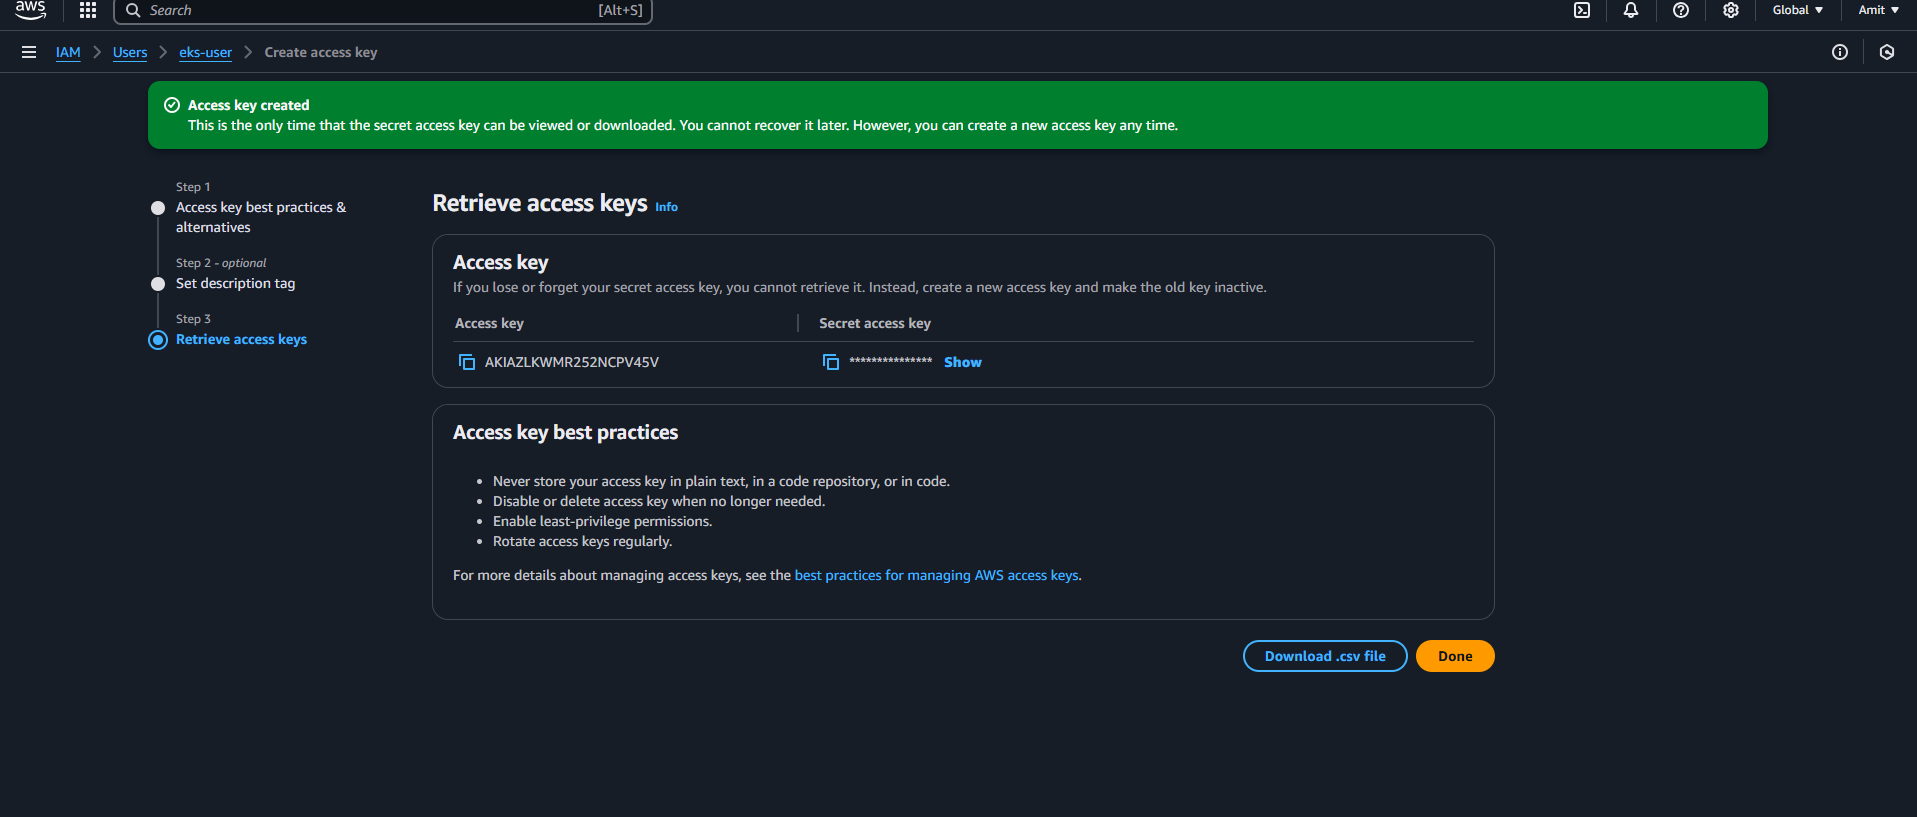
Once the IAM user is created, generate AWS Access Keys and store them securely.
Note: Anything created inside IAM will be on global level.
3. Setting Up CLI Tools
To manage our infrastructure, install the following CLI tools on the EC2 instance:
AWS CLI – To interact with AWS services
kubectl – To communicate with Kubernetes cluster
eksctl – To create and manage EKS clusters
Use the following steps to install these tools:
# Install AWS CLI
curl "https://awscli.amazonaws.com/awscli-exe-linux-x86_64.zip" -o "awscliv2.zip"
sudo apt install unzip
unzip awscliv2.zip
sudo ./aws/install
aws configure

# Install kubectl
curl -o kubectl https://amazon-eks.s3.us-west-2.amazonaws.com/1.19.6/2021-01-05/bin/linux/amd64/kubectl
chmod +x ./kubectl
sudo mv ./kubectl /usr/local/bin
kubectl version --short --client

# Install eksctl
curl --silent --location "https://github.com/weaveworks/eksctl/releases/latest/download/eksctl_$(uname -s)_amd64.tar.gz" | tar xz -C /tmp
sudo mv /tmp/eksctl /usr/local/bin
eksctl version
After installing, configure AWS CLI using the access keys:
aws configure #start configuring
aws s3 ls #Just to test

Deploying the Microservices on EKS
1. Creating the EKS Cluster
Once AWS CLI, kubectl, and eksctl are set up, create the EKS cluster using:
eksctl create cluster --name=EKS-1 \
                      --region=ap-south-1 \
                      --zones=ap-south-1a,ap-south-1b \
                      --without-nodegroup
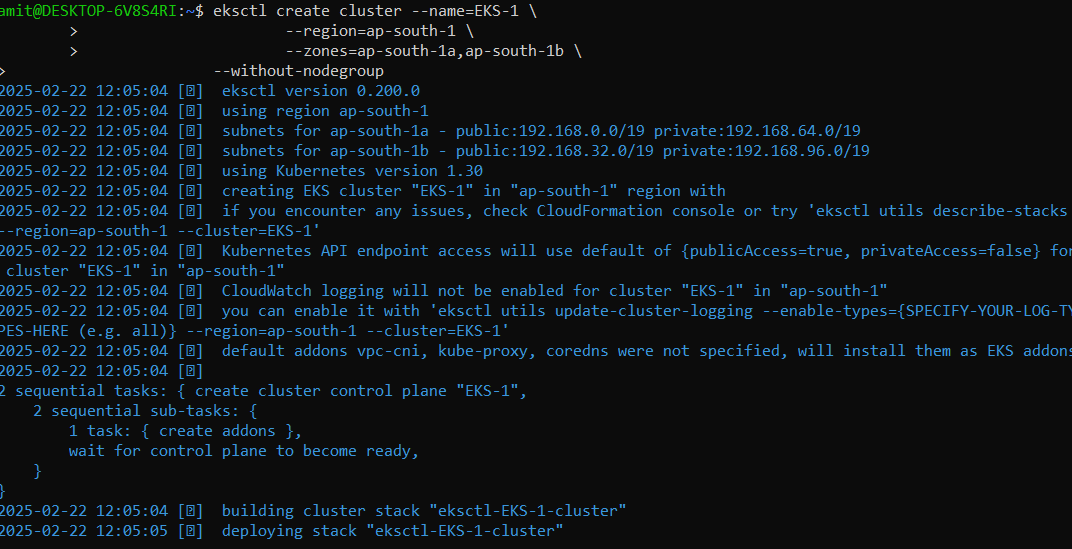
We are setting up EKS Cluster in ap-south-1 mumbai region, we are creating without node-group as we will define node group with next steps in order to create with auto scaling group.
Note: This command will use the Cloud formation tool CFT of AWS (IAC tool) to create EKS Infrastructure on AWS.
Setting Up IAM OIDC with Amazon EKS
eksctl utils associate-iam-oidc-provider \
    --region ap-south-1 \
    --cluster EKS-1 \
    --approve
Setting up IAM Open ID Connect: We need to setup OIDC with EKS because the service account we are going to create in our EKS cluster can assume the IAM roles. While working with EKS we might need some certain resources from our AWS, for that IAM Roles are needed.
This enables Kubernetes service accounts to assume IAM roles, granting minimal privilege access to AWS resources.
The pods we are going to create, they can also assume roles with minimum privilege. If needed they can also work with AWS resources.
When working with Amazon EKS (Elastic Kubernetes Service), we often need our Kubernetes workloads (Pods) to securely access AWS services like S3, DynamoDB, RDS, CloudWatch, etc.
However, we don’t want to give broad IAM permissions to the entire cluster. Instead, we follow a least-privilege approach by granting specific permissions to specific workloads. This is where IAM Roles for Service Accounts (IRSA) come into play, and for that, we need to set up OIDC (OpenID Connect) with EKS.
Why Do We Need OIDC with EKS?
IAM Roles for Pods
Normally, AWS IAM roles are attached to EC2 instances, but in Kubernetes, multiple applications (pods) run inside a single node.
Without OIDC, every pod running on the same EC2 node would have the same IAM permissions, which is a security risk.
Granular Access Control
By associating an OIDC provider with our EKS cluster, we can map IAM roles directly to Kubernetes Service Accounts instead of EC2 nodes.
This allows only specific pods to assume IAM roles and interact with AWS services securely.
Create an IAM Role for Service Accounts
Define an IAM role with specific permissions for AWS resources (e.g., S3 access).
Add an OIDC trust policy so that Kubernetes can use this role.
Associate the IAM Role with a Kubernetes Service Account
Create a Kubernetes Service Account and link it to the IAM role.
Pods that use this service account will automatically assume the IAM role.
Autoscaling Enabled for EKS: Node group creation
eksctl create nodegroup --cluster=EKS-1 \
                       --region=ap-south-1 \
                       --name=node2 \
                       --node-type=t3.medium \
                       --nodes=3 \
                       --nodes-min=2 \
                       --nodes-max=4 \
                       --node-volume-size=20 \
                       --ssh-access \
                       --ssh-public-key=DevOps \
                       --managed \
                       --asg-access \
                       --external-dns-access \
                       --full-ecr-access \
                       --appmesh-access \
                       --alb-ingress-access
There will be 3 worker nodes will be created. If users are more then max 4 node will be scaled, if not then minimum 2 node will be there.
Explanation:
3 Worker Nodes – Default setup.
Auto-Scaling – Minimum 2 nodes, maximum 4 nodes.
Node Volume – 20 GB.
SSH Access – Using the specified key.
We will access with EKS with ssh-access and the public key will use “DevOps” key.
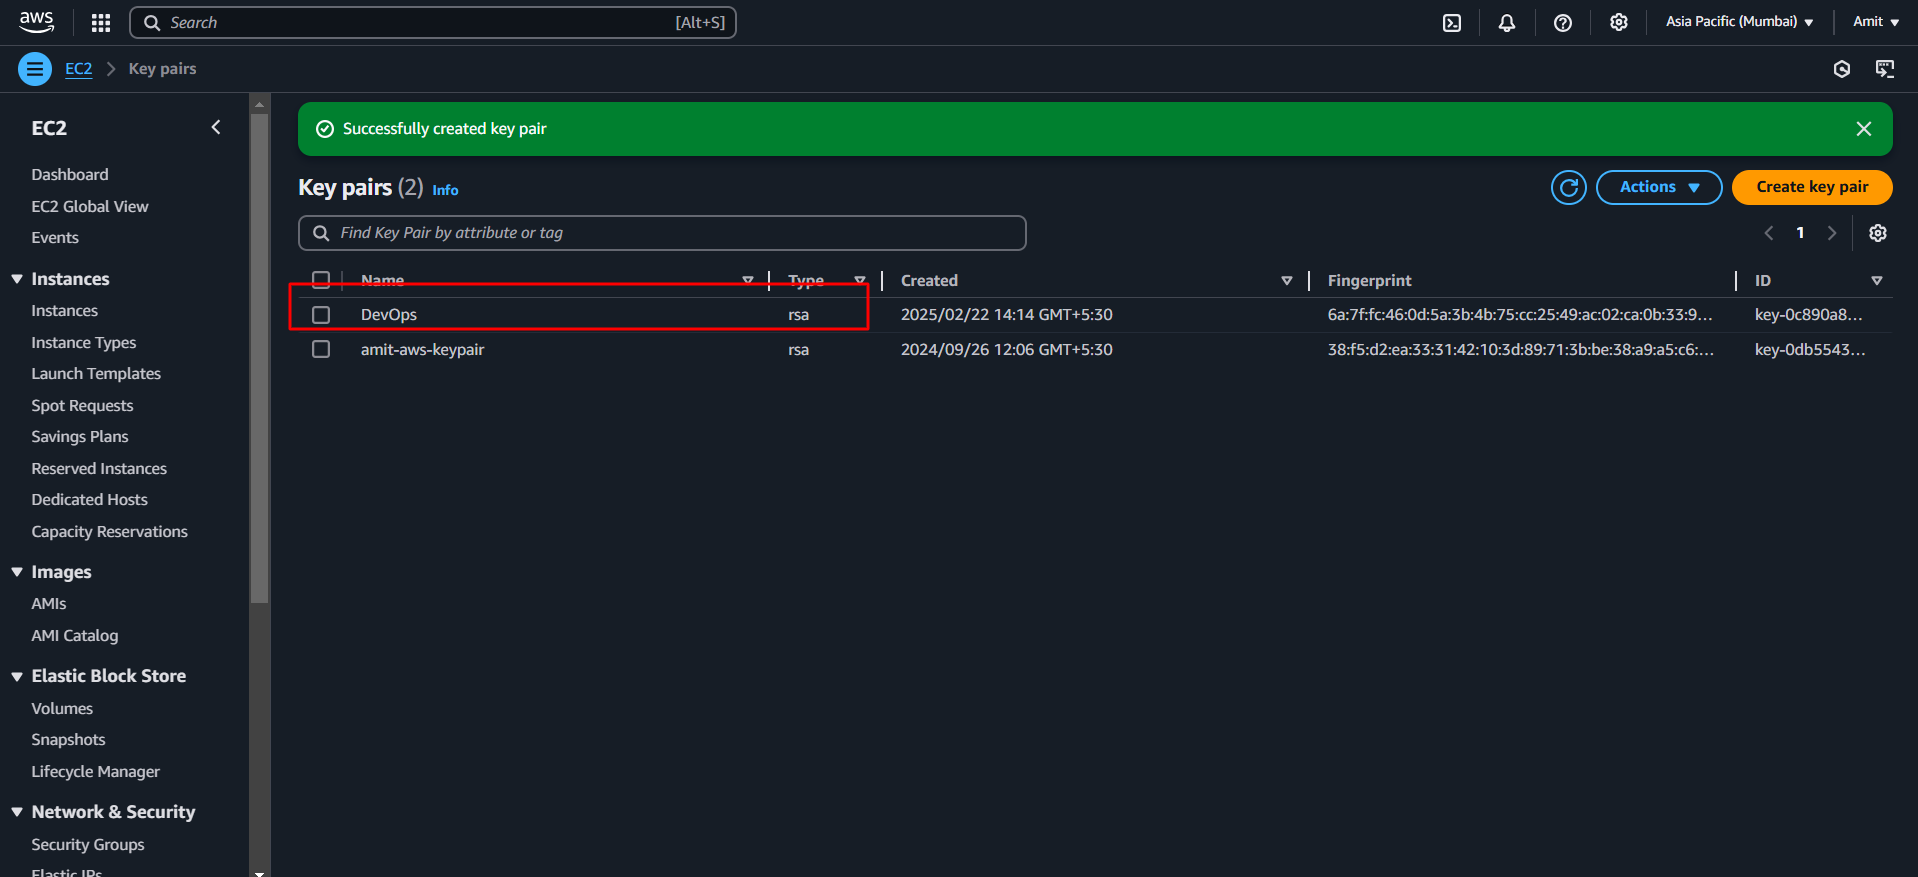
Creation of DevOps key in ap-south-1 mumbai region
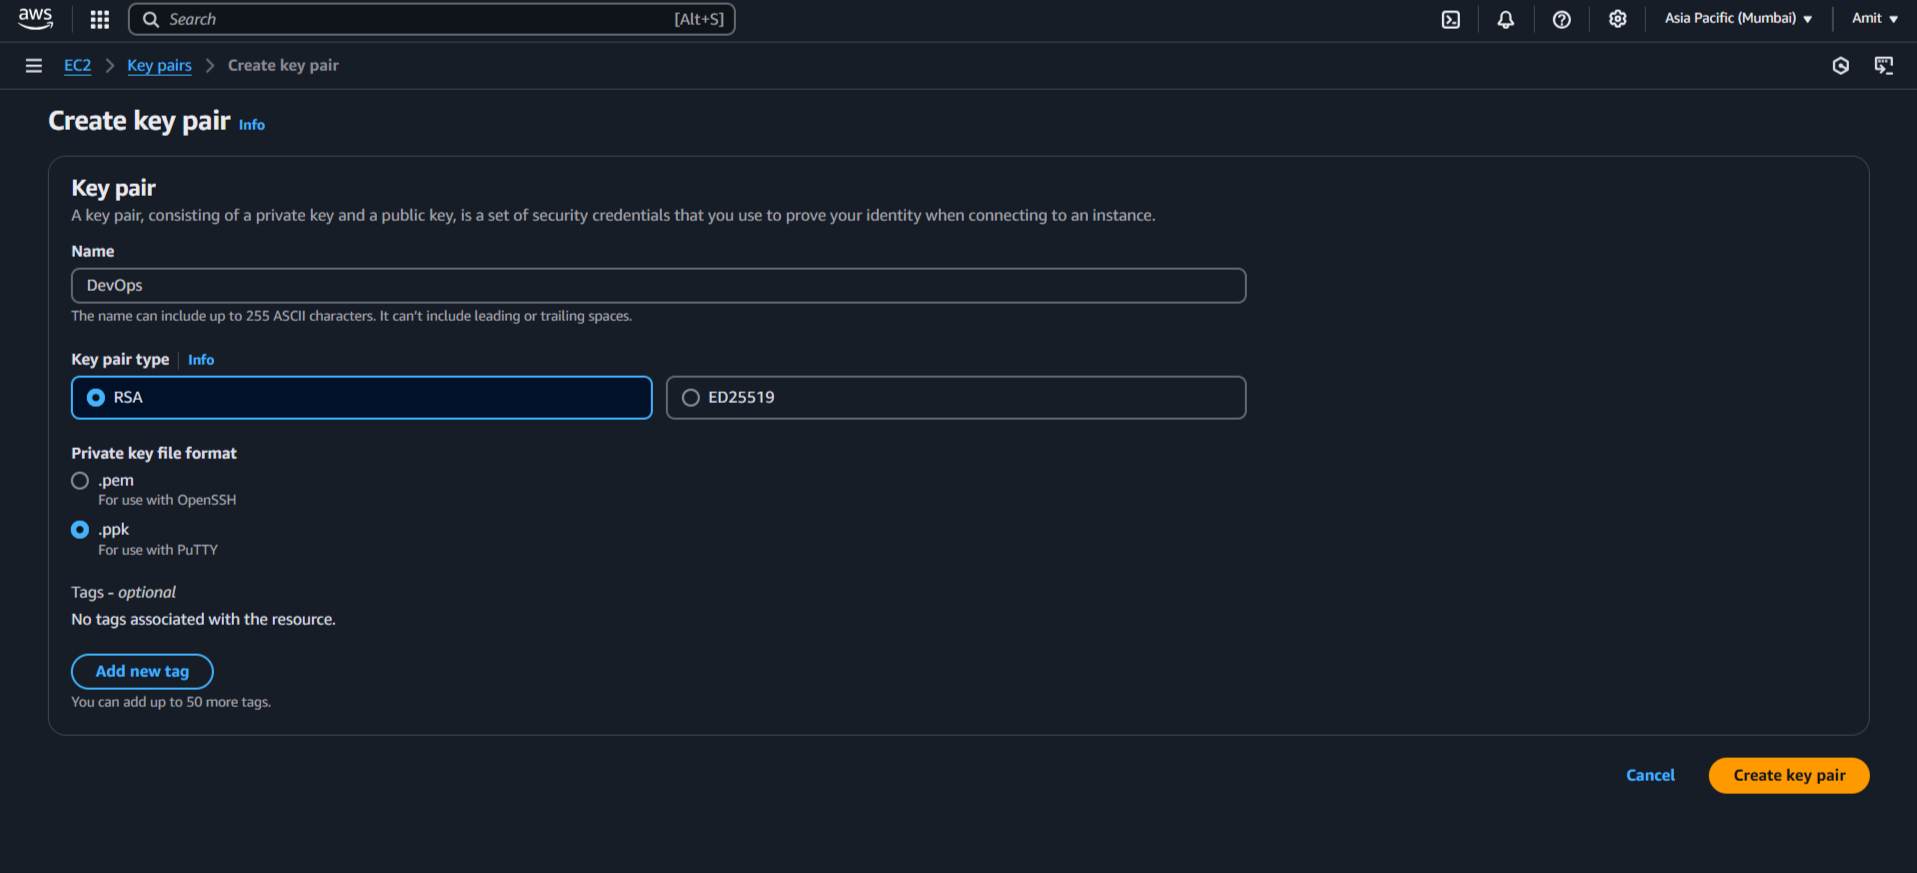
DevOps is same key will use for communication, that is ssh-access for EKS cluster setup.
Installing and Configuring Jenkins on our EC2 - “Server”
Jenkins requires Java 17, which we install using:
sudo apt install openjdk-17-jdk -y
After Java installation, proceed with Jenkins installation:
wget -q -O - https://pkg.jenkins.io/debian/jenkins.io.key | sudo apt-key add -
sudo sh -c 'echo deb http://pkg.jenkins.io/debian-stable binary/ > /etc/apt/sources.list.d/jenkins.list'
sudo apt update
sudo apt install jenkins -y
Jenkins runs on port 8080. To access it, enter:
http://<Public-IP>:8080
Installing Docker on our EC2 - “Server”
Since we need Docker for our pipelines, install it using:
sudo apt install docker.io -y
By default, only the root user can execute Docker commands. Grant permission to other users:
sudo chmod 666 /var/run/docker.sock
or
sudo usermod -aG docker $USER && newgrp docker
This ensures that Jenkins and other non-root users can run Docker commands.
Configuring Jenkins for Docker and Kubernetes Pipelines
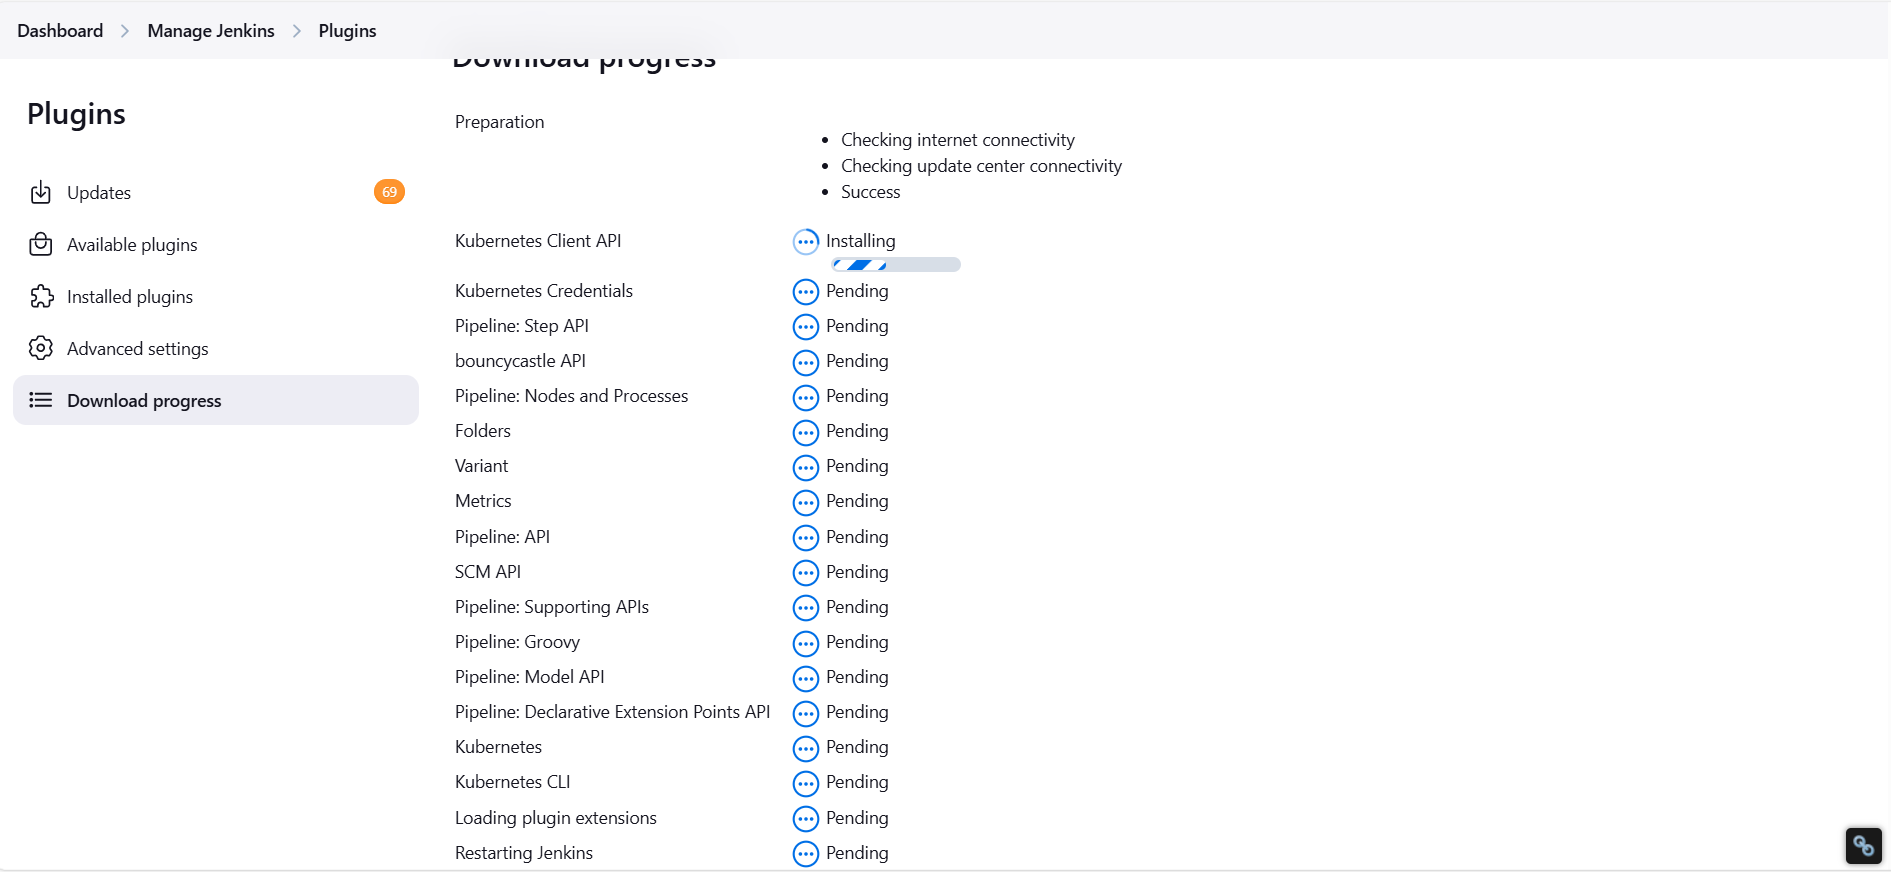
Installing Plugins in Jenkins
Navigate to Manage Jenkins > Plugins > Available Plugins, and install:
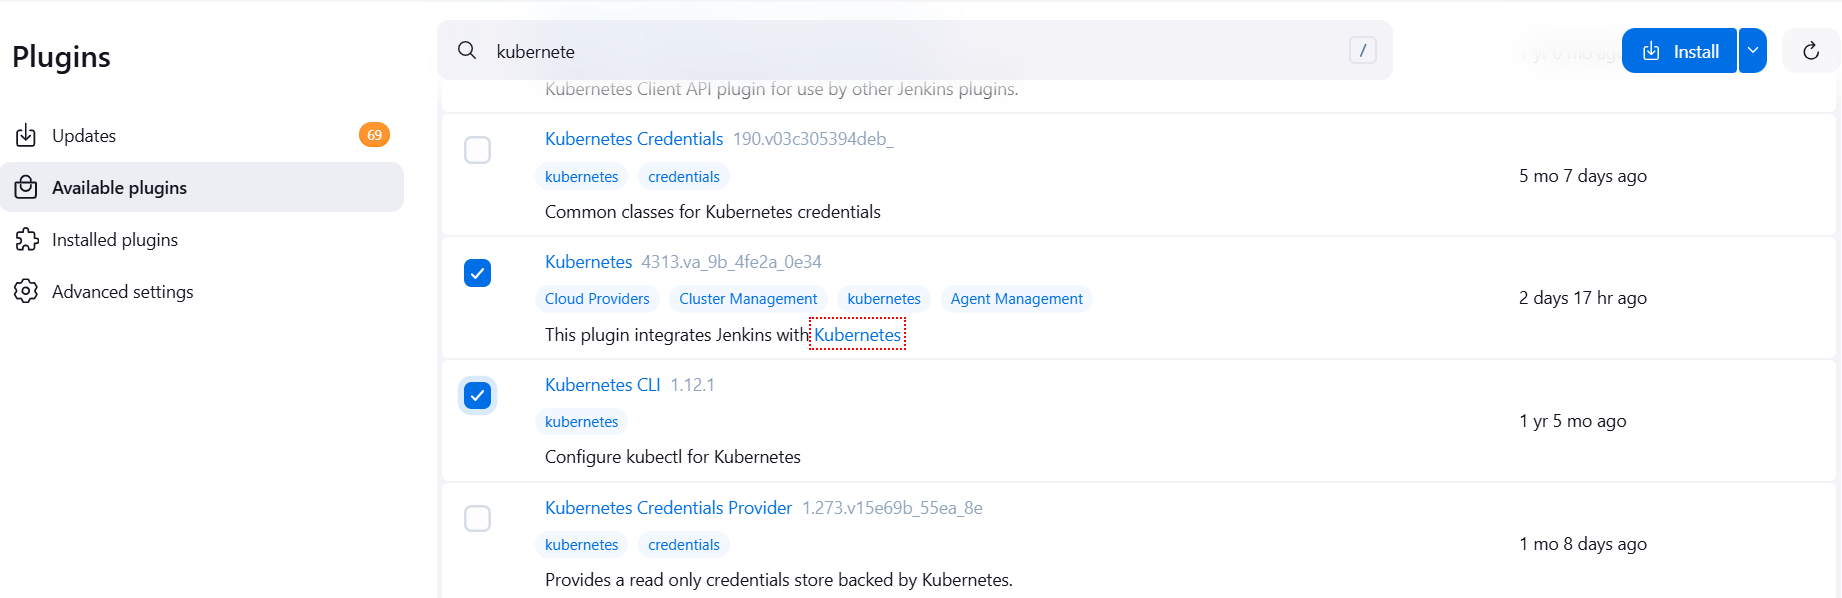
Docker and docker pipeline
Kubernetes and Kubernetes CLI
Total 4 plugins
Configuring Docker in Jenkins
Manage Jenkins > Global Tool Configuration
Scroll to Docker Installations
Click Add Docker, set name as
docker, and select Install automatically.

Before connecting Jenkins to docker
In each branch we have different Jenkins file and in each Jenkins file we have mentioned the docker and docker-cred
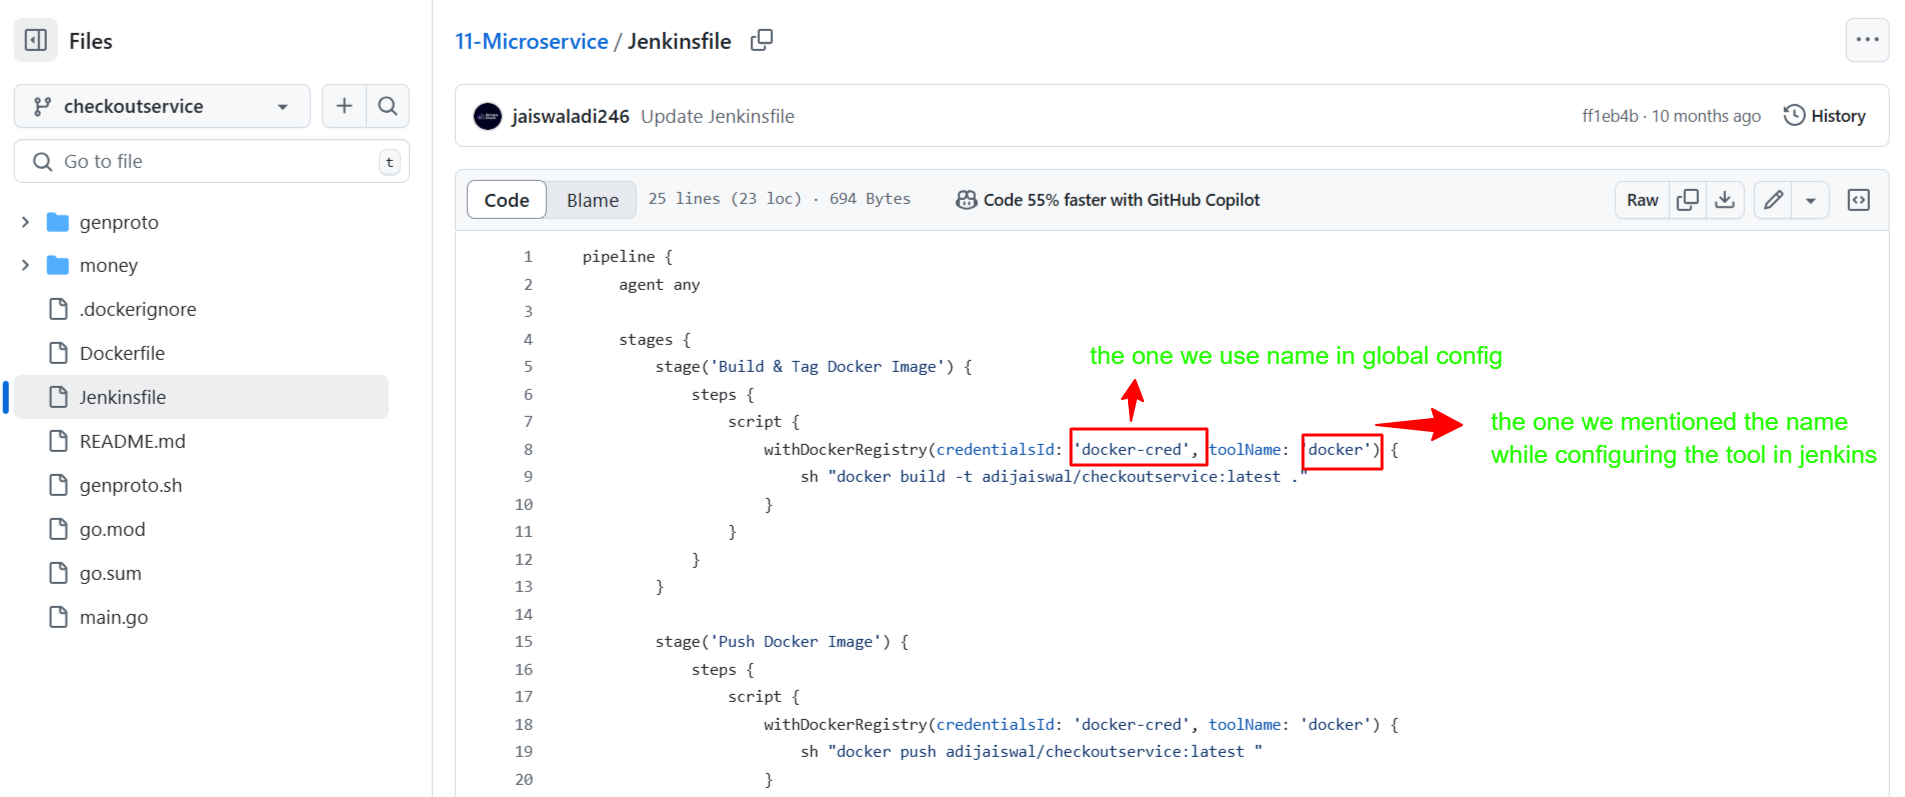
This will help you to understand what name we will provide to our docker variables. To prevent errors.
Jenkinsfile for Docker Build and Push
Each microservice has a Jenkinsfile with:
pipeline {
    agent any

    stages {
        stage('Build & Tag Docker Image') {
            steps {
                script {
                    withDockerRegistry(credentialsId: 'docker-cred', toolName: 'docker') {
                        sh "docker build -t amitsinghs98/checkoutservice:latest ."
                    }
                }
            }
        }

        stage('Push Docker Image') {
            steps {
                script {
                    withDockerRegistry(credentialsId: 'docker-cred', toolName: 'docker') {
                        sh "docker push adijaiswal/checkoutservice:latest "
                    }
                }
            }
        }
    }
}
Important Notes:
The Credential ID in Jenkins must match
docker-cred.The Docker Tool Name must be
docker.
Connecting Jenkins to docker hub
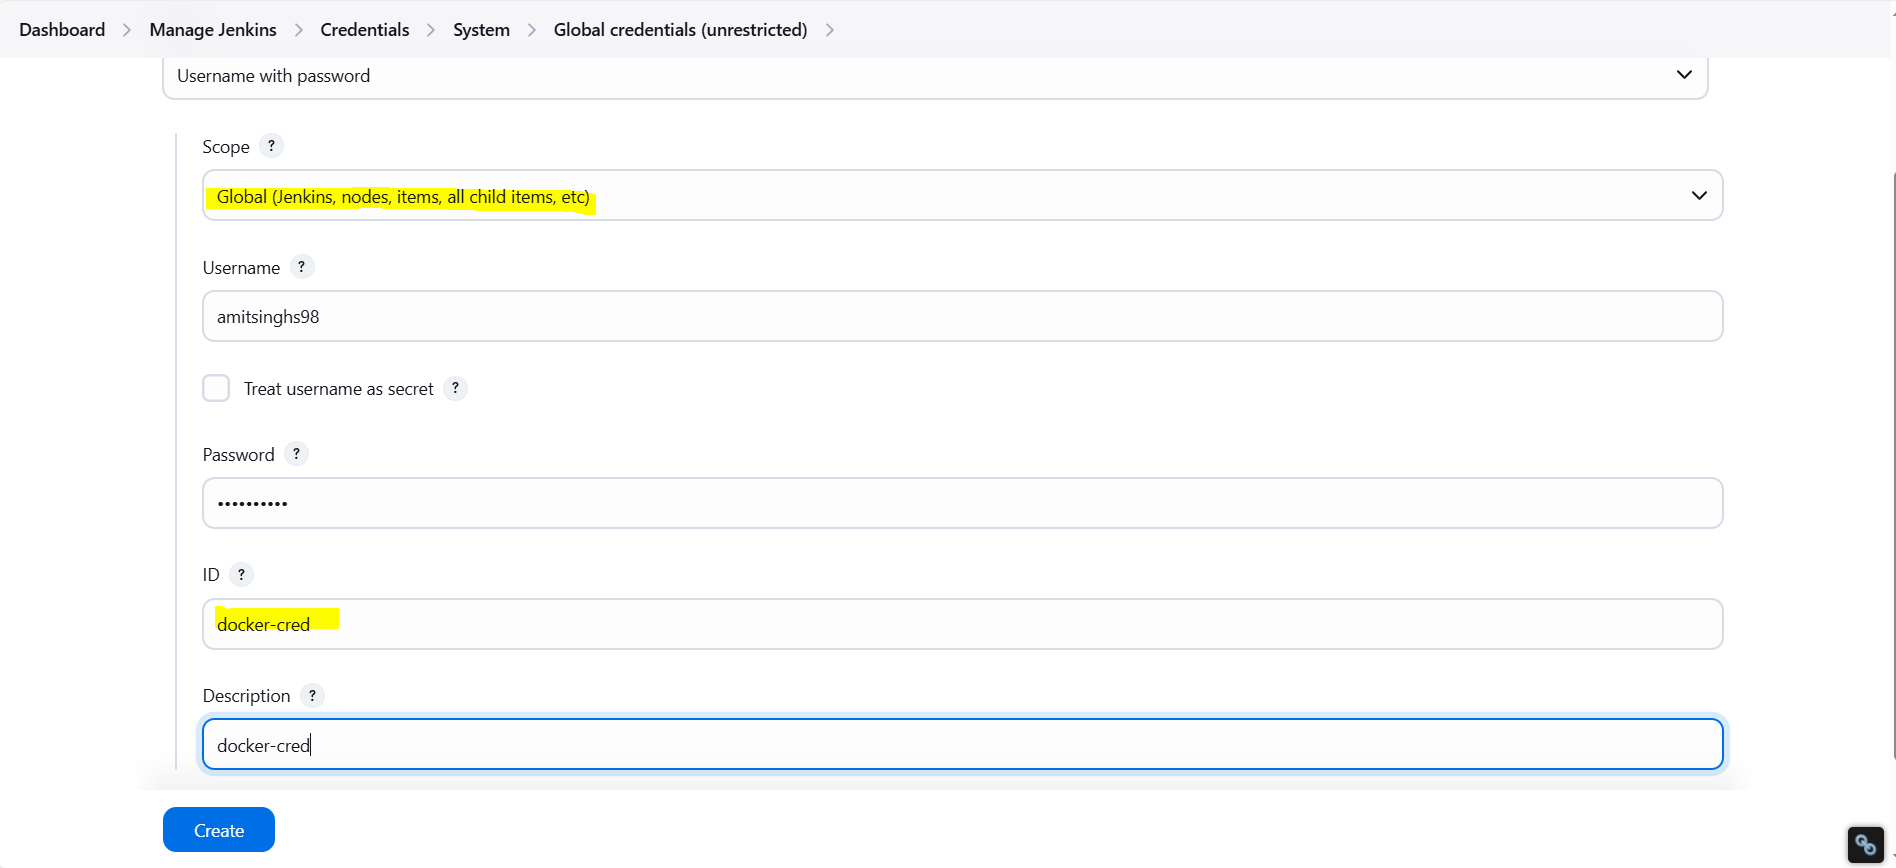
To connect to GitHub:
Go to Manage Jenkins > Credentials.
Click Global > Add Credentials.
Choose Username & Password:
Username: docker hub username
Password: docker password
ID:
docker-cred
Connecting Jenkins to GitHub
You can skip if your repo is public, needed when your repo is private
To connect to GitHub:
Go to Manage Jenkins > Credentials.
Click Global > Add Credentials.
Choose Username & Password:
Username: GitHub username
Password: GitHub personal access token
ID:
github-cred

Creating a Multi-Branch Pipeline in Jenkins
Since our microservices project has multiple branches, we use a Multi-Branch Pipeline:
Jenkins Dashboard > New Item
Choose Multi-Branch Pipeline.

- Once you go inside Multibranch then under Branch Sources, select GitHub.
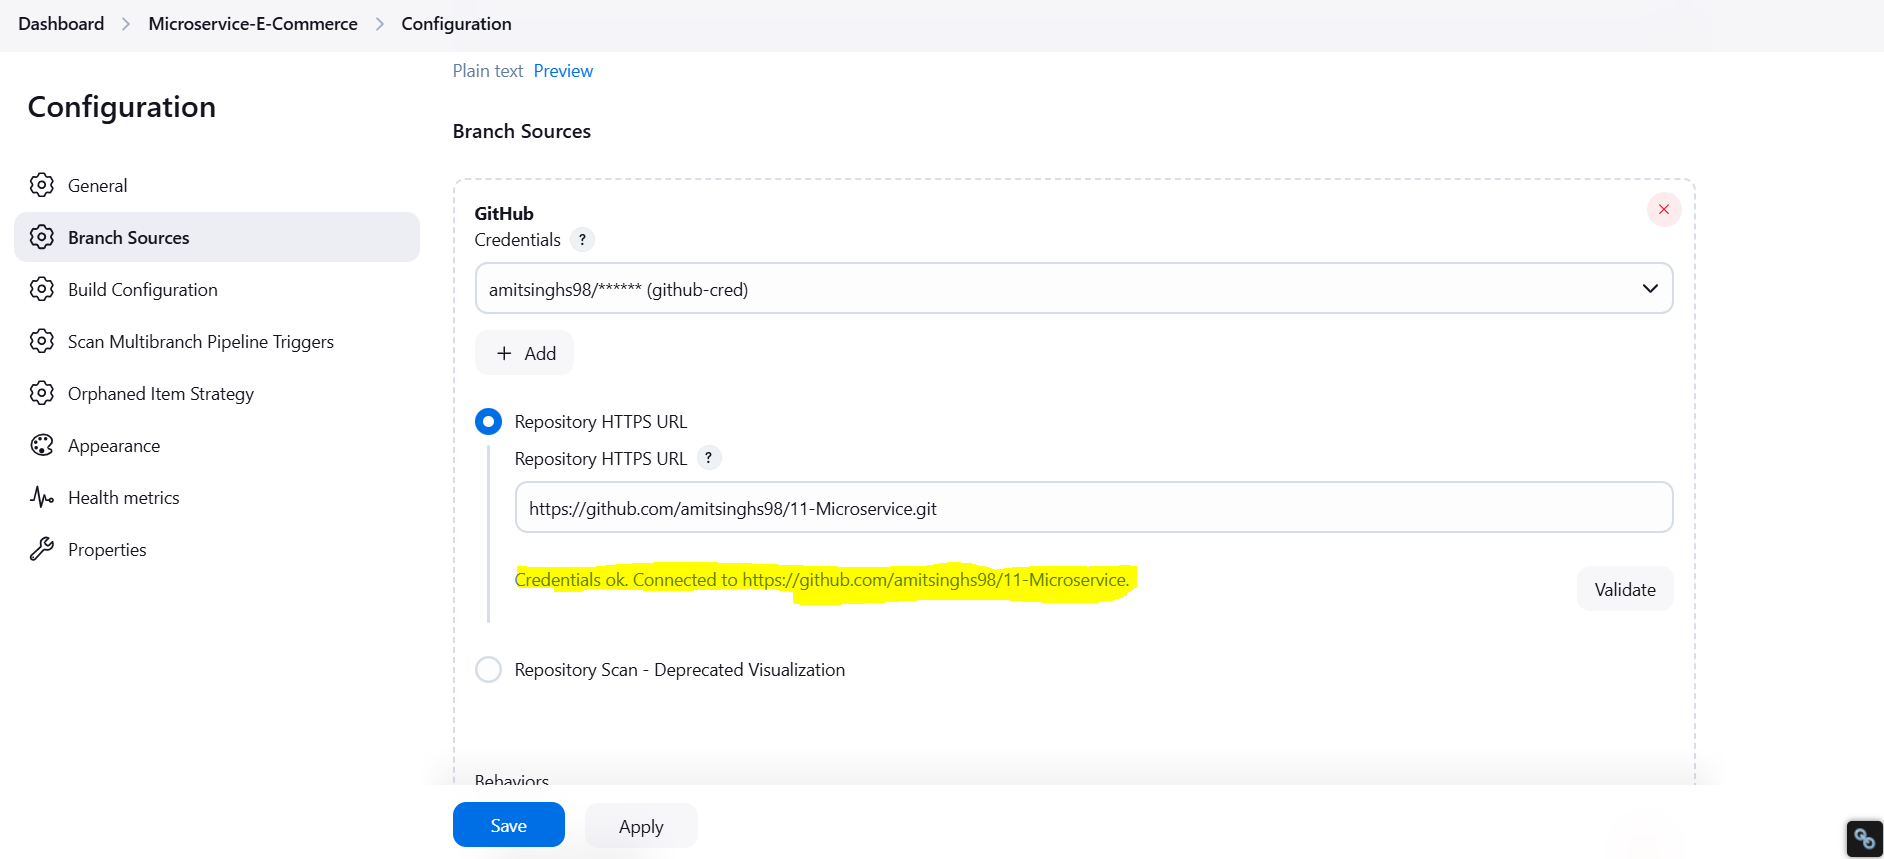
4. Add Repository URL and set credentials to github-cred.
We need to install a tool for multibranch pipeline trigger, the above option won’t work.
Let’s go to Manage Jenkins > Plugins
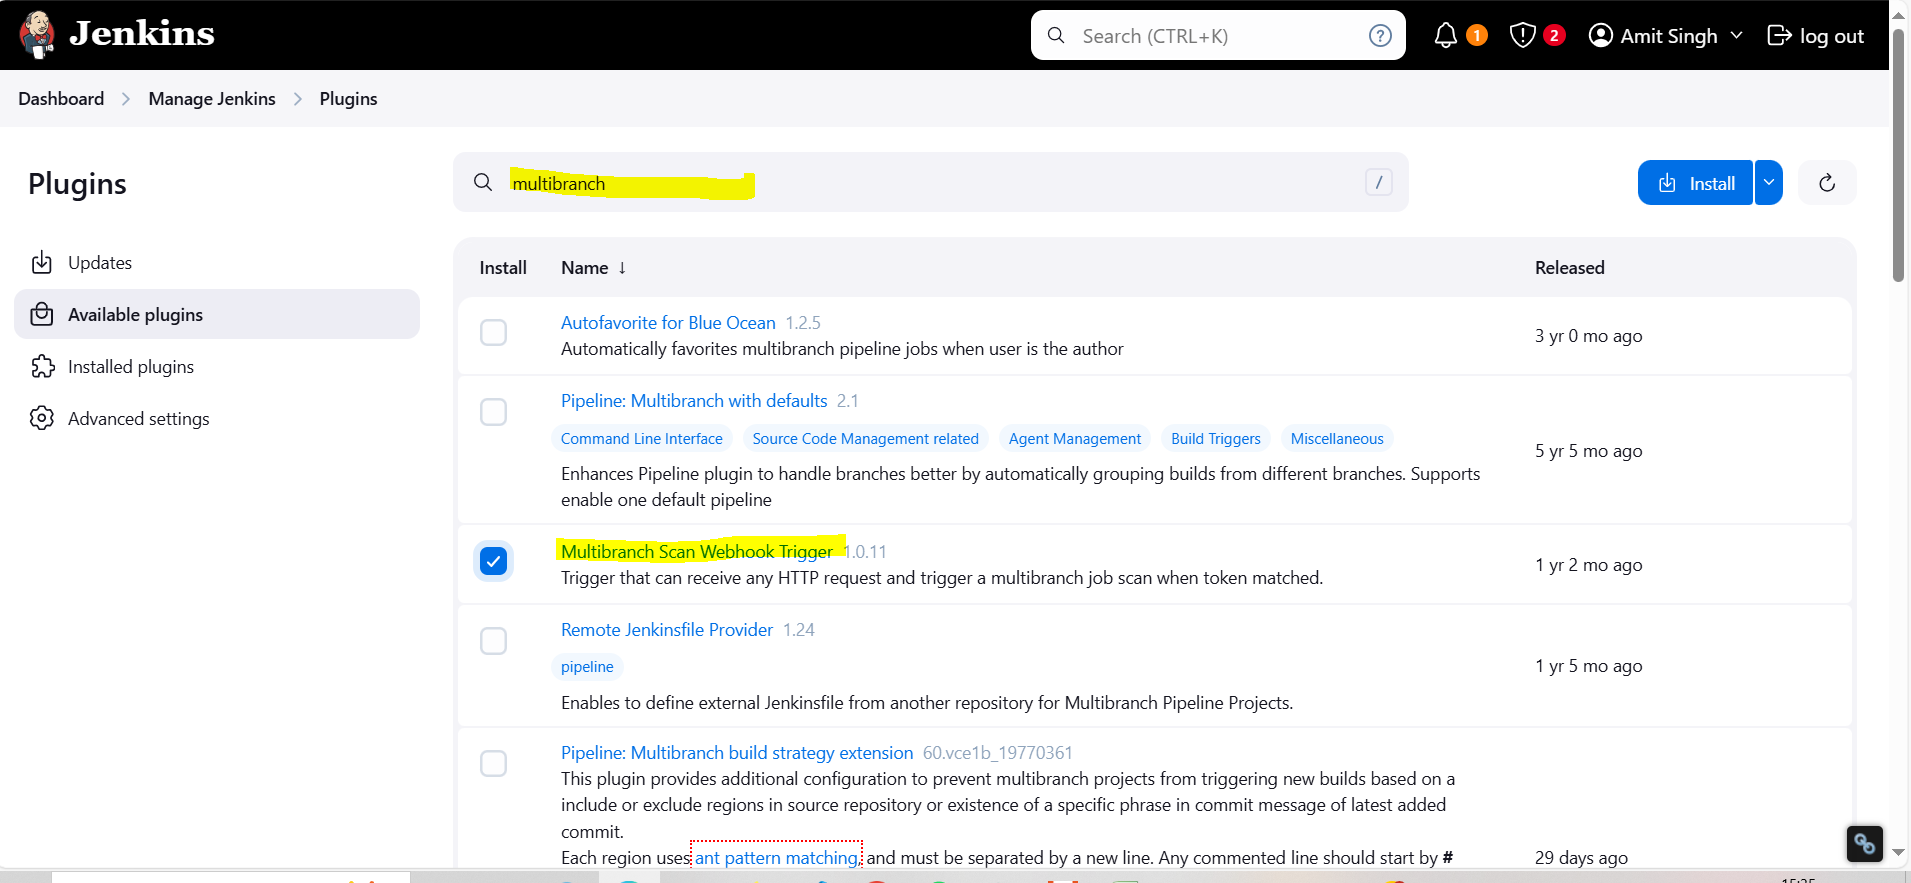
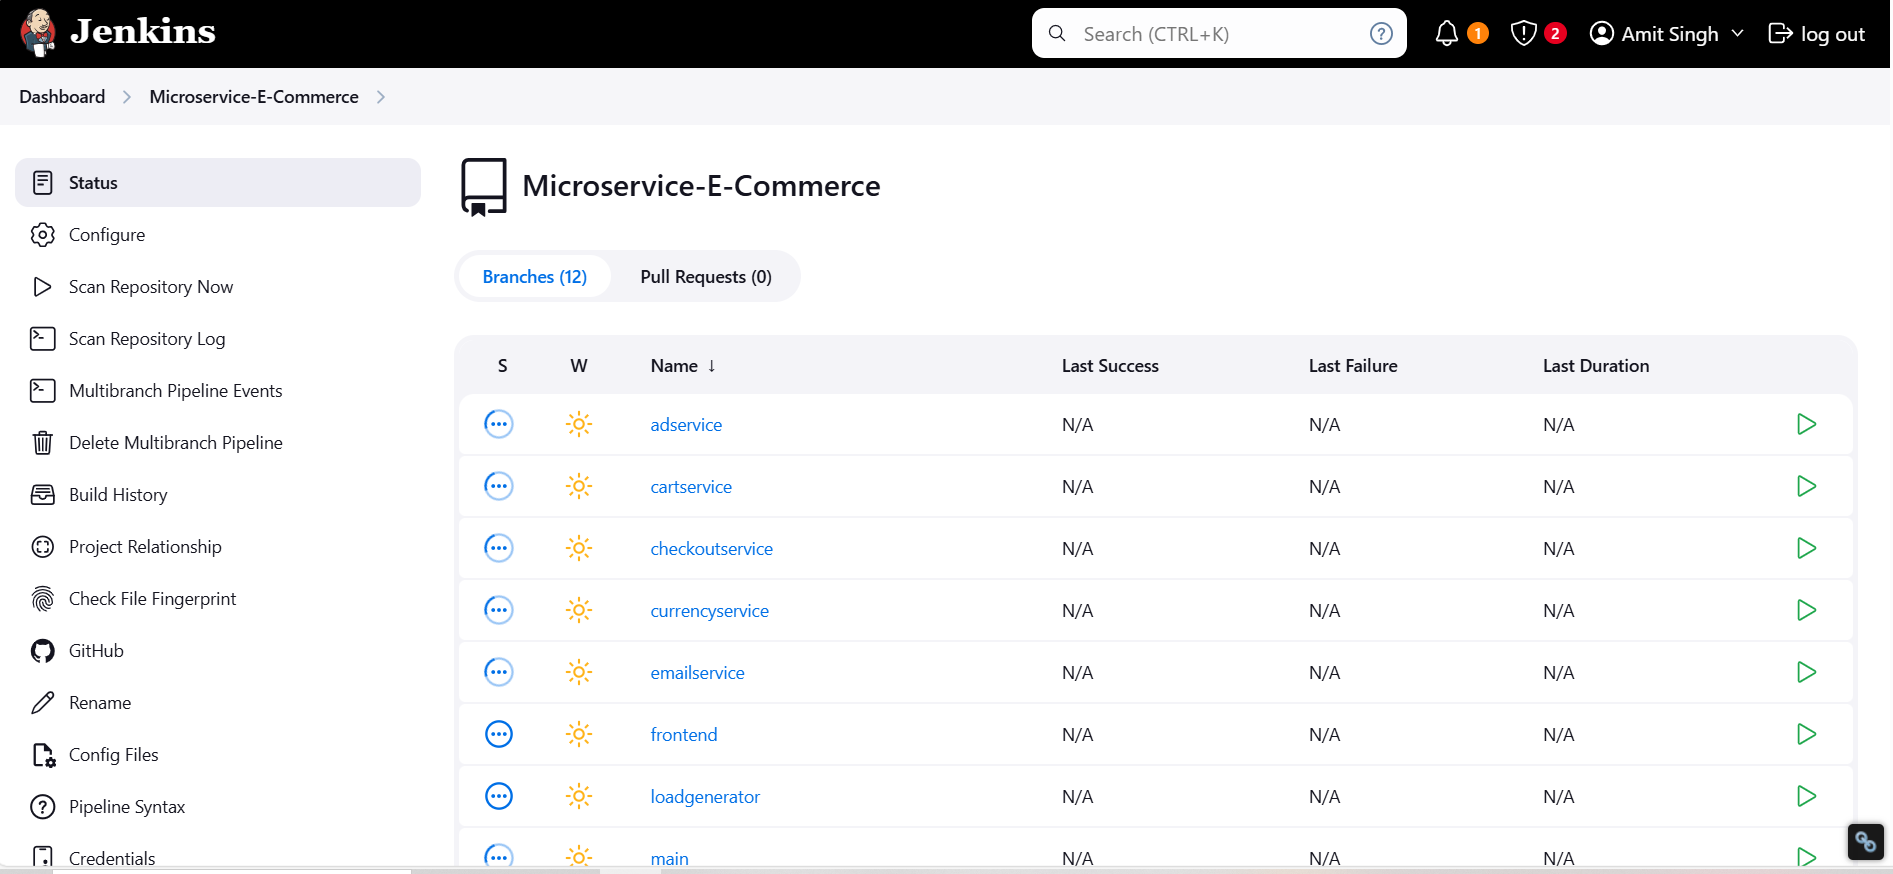
Now Each branch will now have its own pipeline automatically with help of Multibranch Scan plugin.
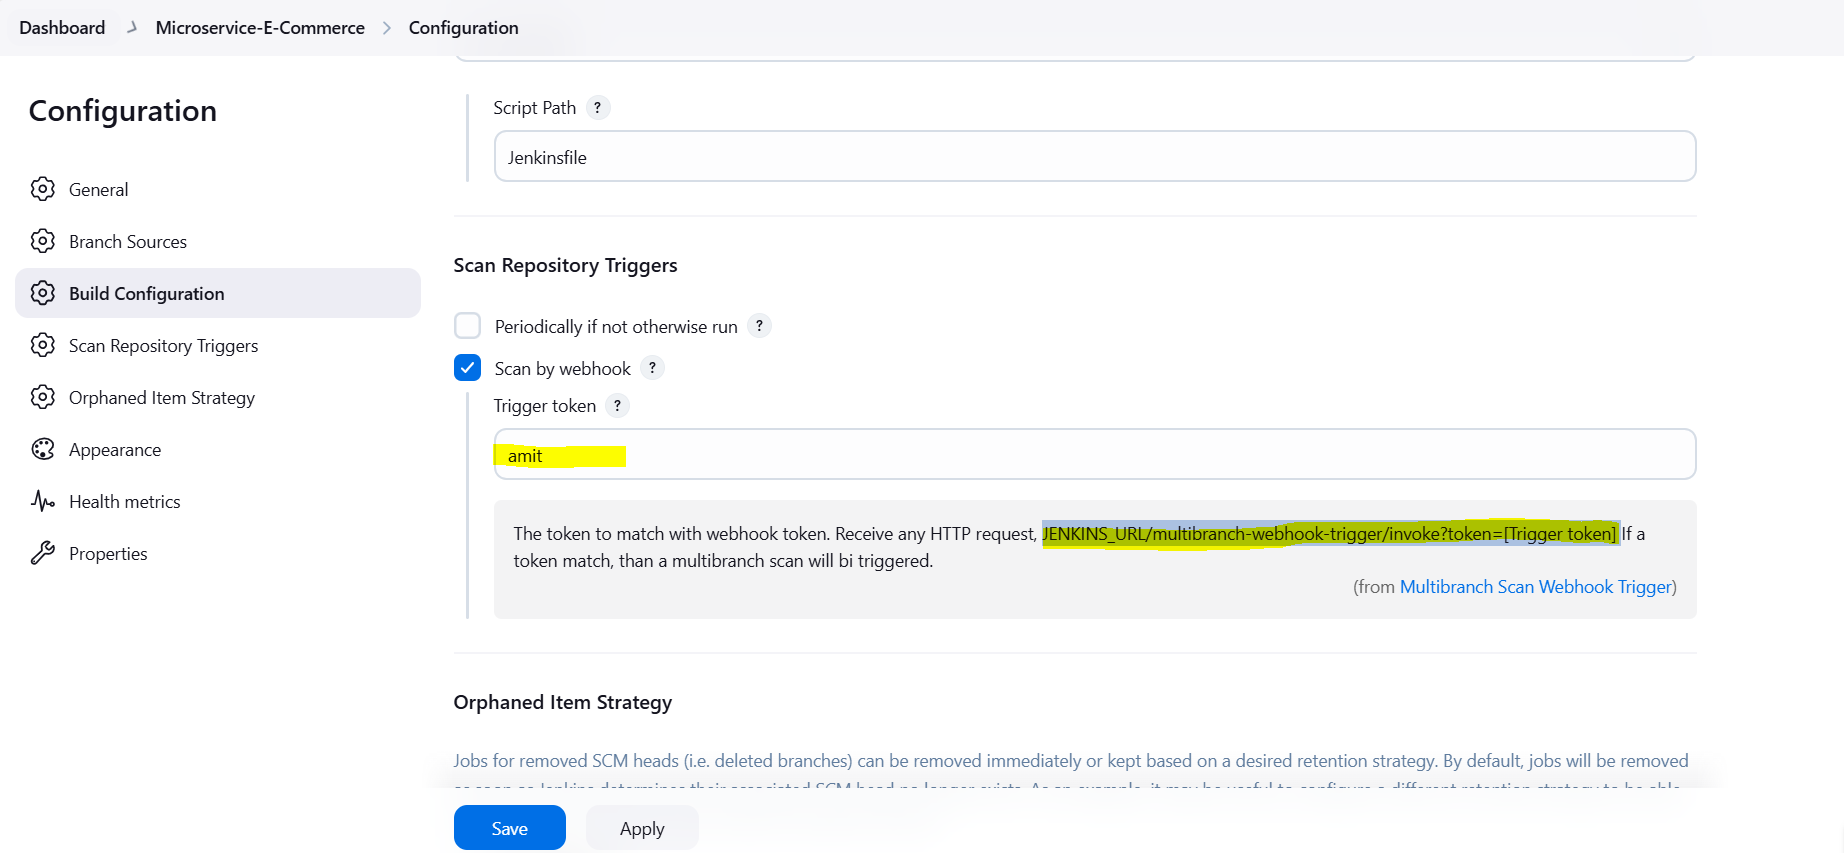
After installing plugin, as you can see the “Scan by webhook” save the line which I have marked. I have gave the token name as “amit” and “SAVE”
Copy This token to your github now
- Go to Github Repo Setting > Webhook (inside repo setting) > Payload URL > Add webhook
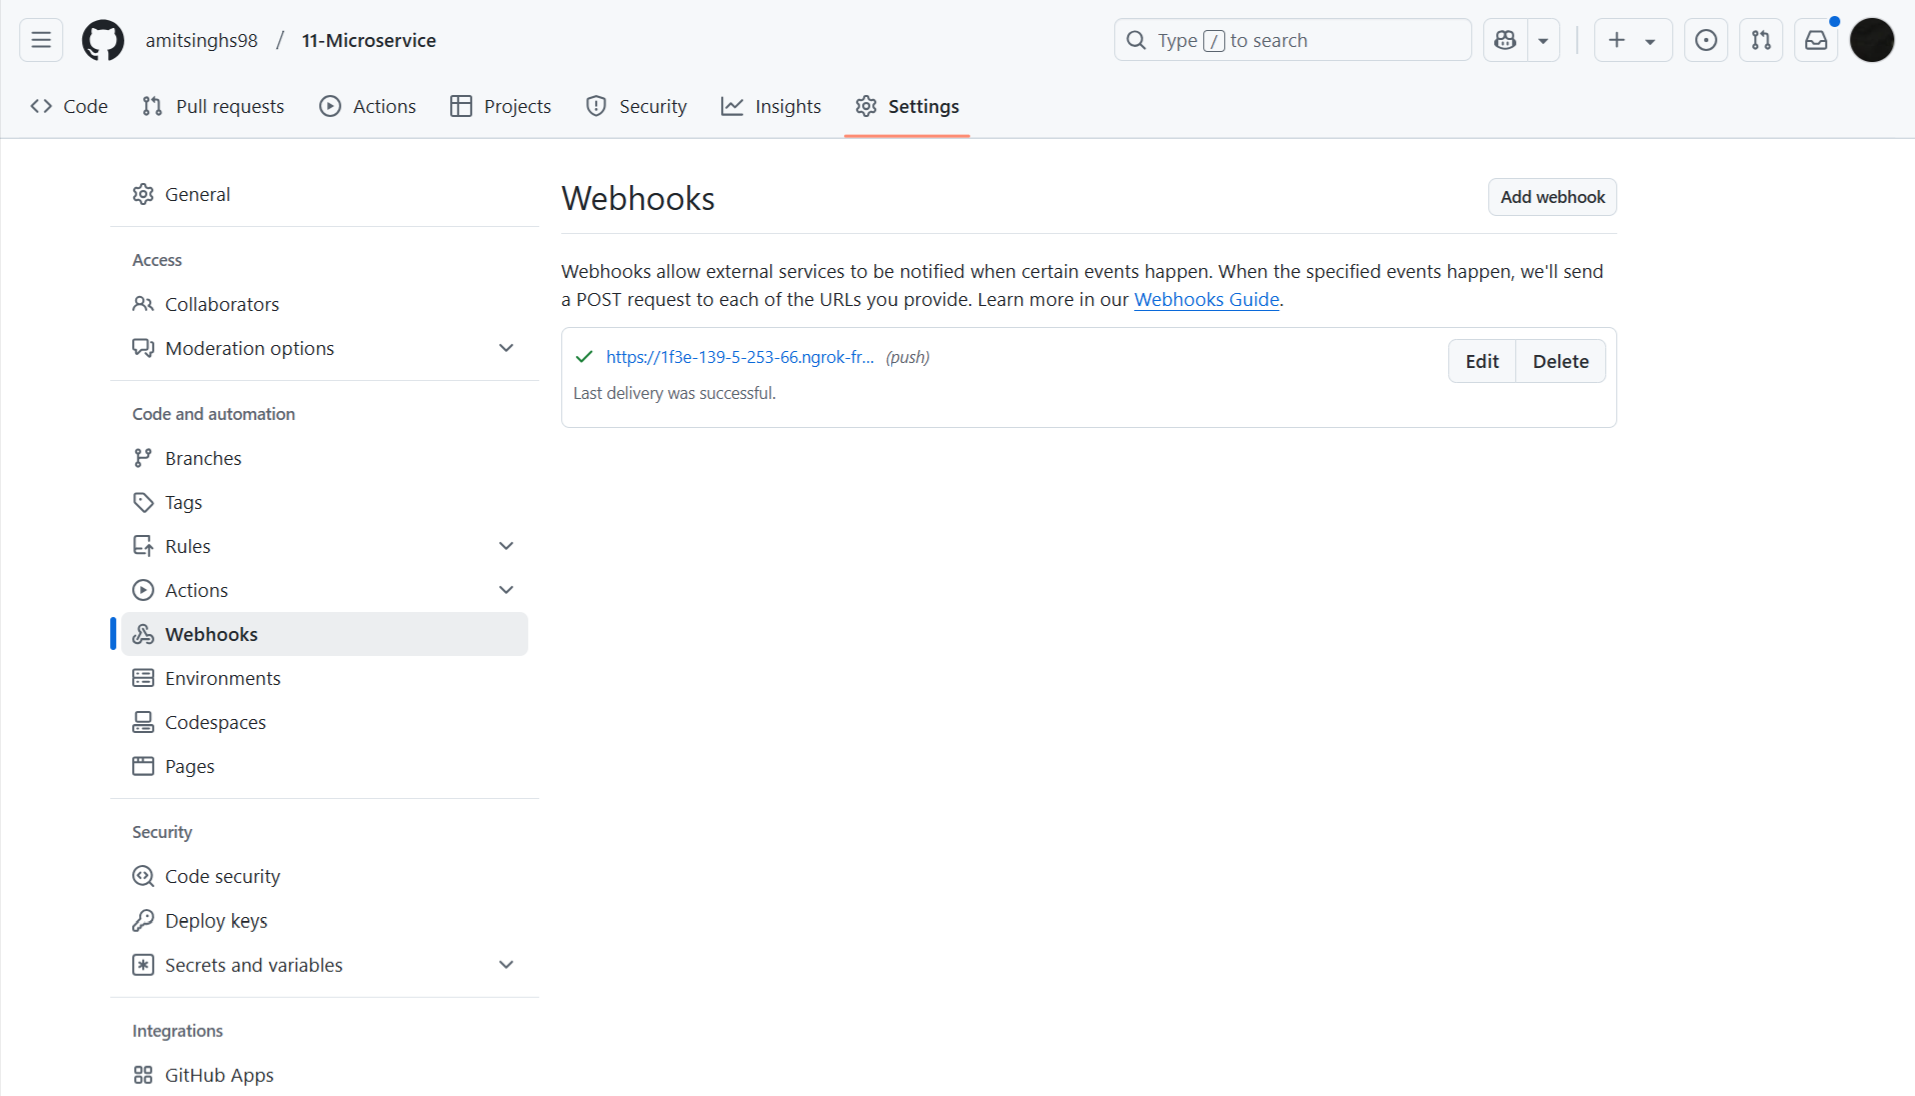
After adding web hook our pipeline got triggered
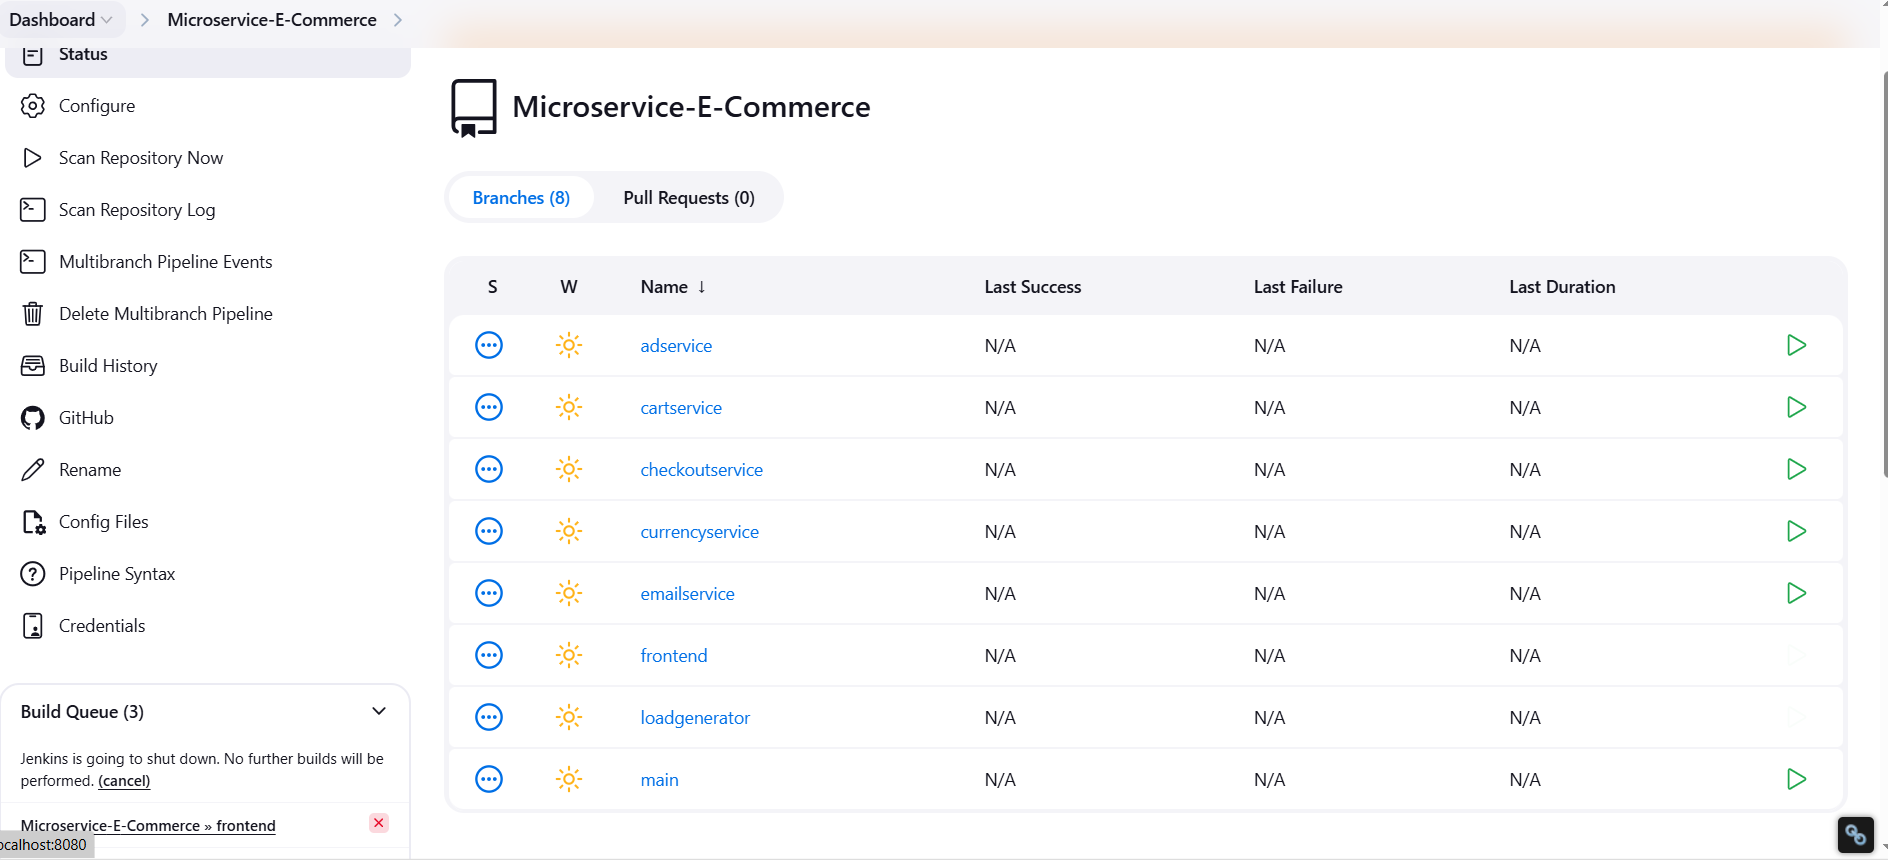
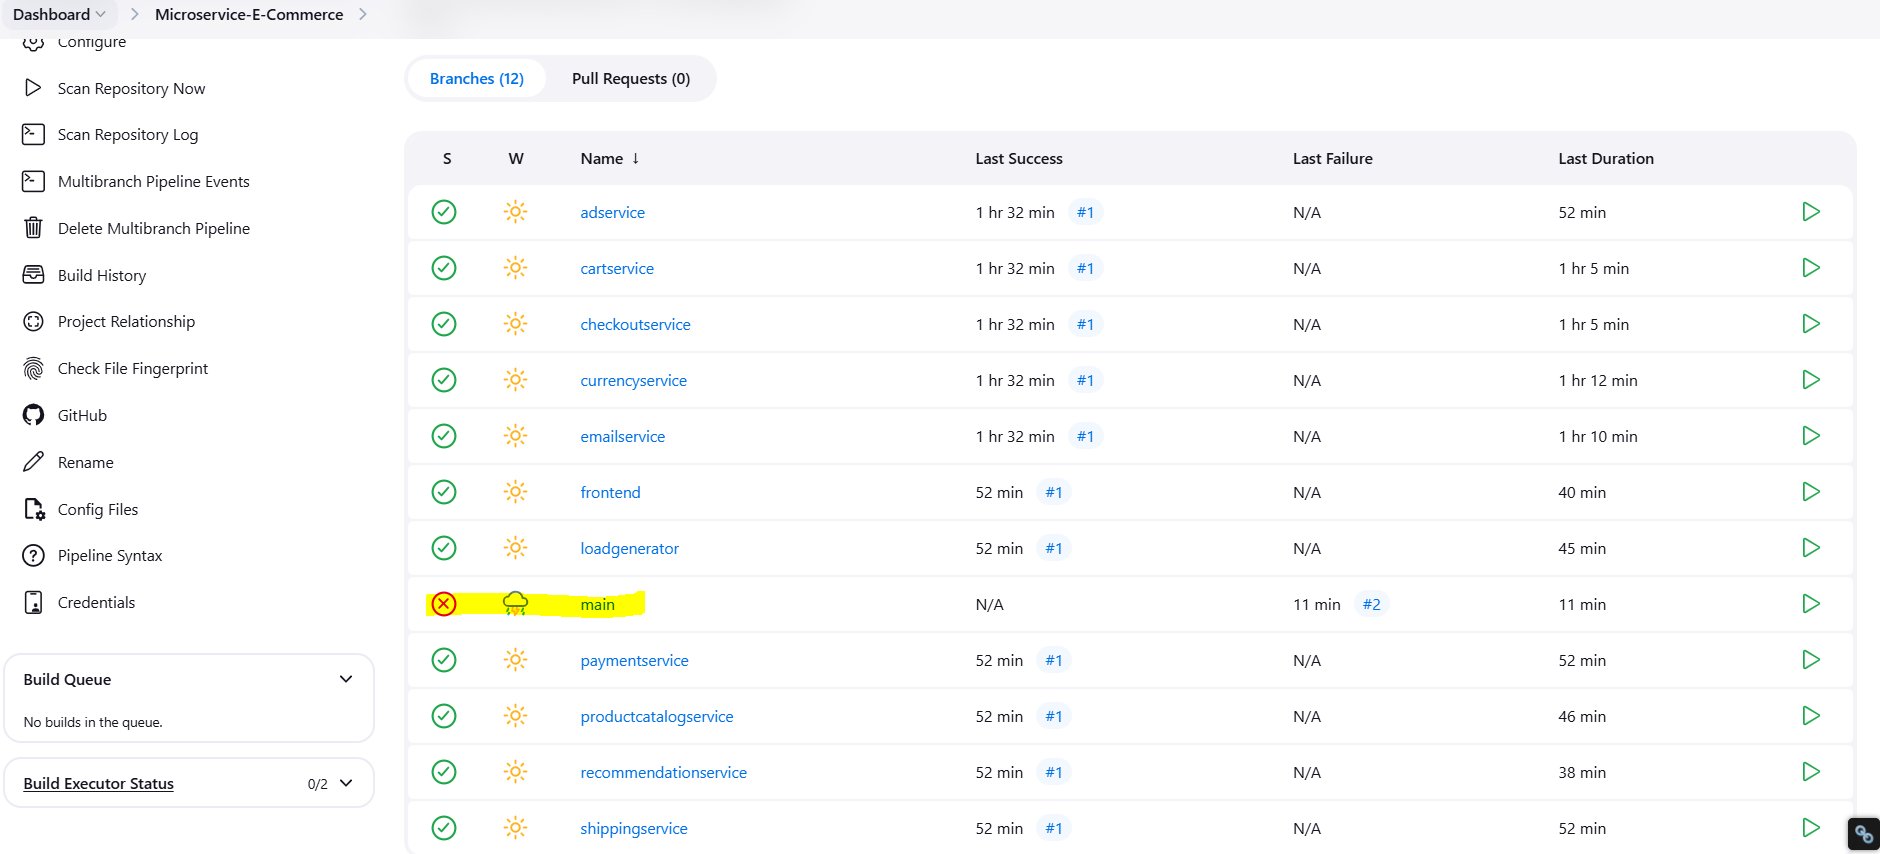
As you can see our main branch got failed because it’s part of CD and we will configure our main branch in CD part with Kubernetes. Main branch also got triggered right now because we have the Jenkinsfile inside our main branch.
So Benefit of this pipeline: Once user commits a change in any of the branch inside repo, the pipeline will be triggered automatically with help of webhook we have configured, and the plugin we have installed “scan by webhook”
Our Jenkinsfile is automatically fetched from our repo from github.
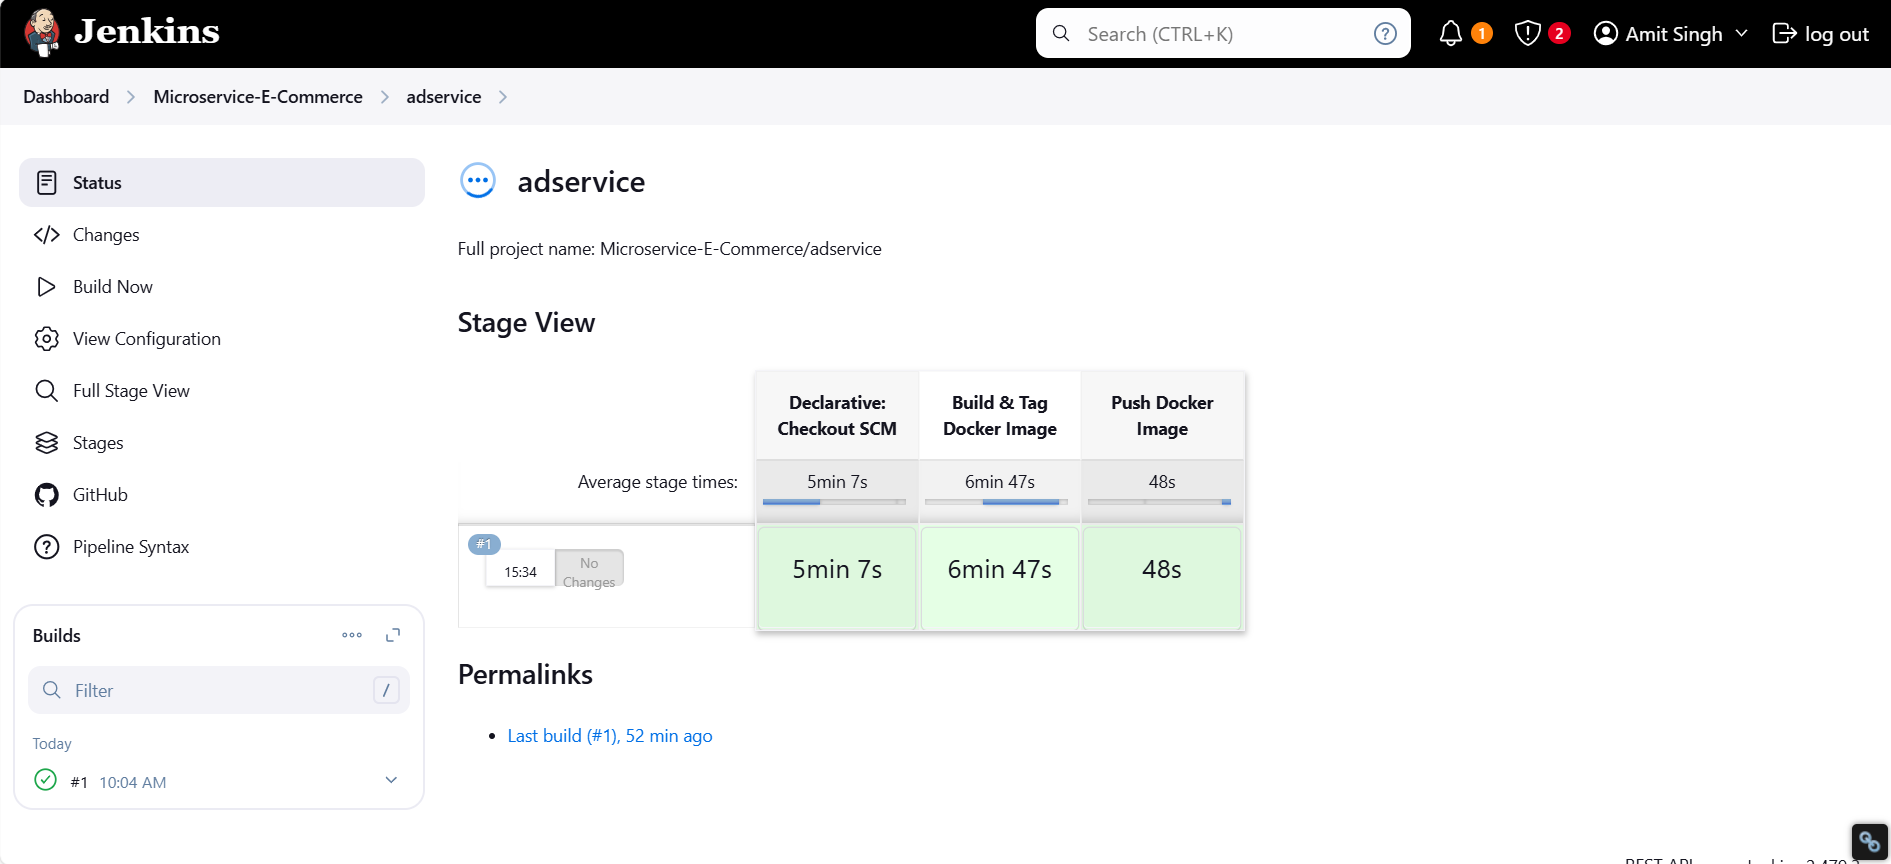
Once someone commits the changes in a branch, then specific branch microservice pipeline will trigger and build the docker image and push to dockerhub.
Here our Continuous Integration CI part completed.
Moving forward with Continuous Deployment CD Part
Create Service Account, Role & Assign that role, And create a secret for Service Account and generate a Token
Hope your EKS Infrastructure is ready till now
Go to your ec2 “EC2”
Configuring Kubernetes now
Create a namespace
kubectl create namespace webapps
Creating Service Account
vim svc.yml
apiVersion: v1
kind: ServiceAccount
metadata:
  name: jenkins
  namespace: webapps
kubectl apply -f svc.yml
Create Role
vim role.yml
apiVersion: rbac.authorization.k8s.io/v1
kind: Role
metadata:
  name: app-role
  namespace: webapps
rules:
  - apiGroups:
        - ""
        - apps
        - autoscaling
        - batch
        - extensions
        - policy
        - rbac.authorization.k8s.io
    resources:
      - pods
      - componentstatuses
      - configmaps
      - daemonsets
      - deployments
      - events
      - endpoints
      - horizontalpodautoscalers
      - ingress
      - jobs
      - limitranges
      - namespaces
      - nodes
      - pods
      - persistentvolumes
      - persistentvolumeclaims
      - resourcequotas
      - replicasets
      - replicationcontrollers
      - serviceaccounts
      - services
    verbs: ["get", "list", "watch", "create", "update", "patch", "delete"]
kubectl apply -f role.yml
Bind the role to service account
This command will assign the role to svc (account which is Jenkins, confirm in the svc.yml file our service account metadata: Jenkins). So our Jenkins service account will have permissions mentioned in the role.yml file
vim bind.yml
apiVersion: rbac.authorization.k8s.io/v1
kind: RoleBinding
metadata:
  name: app-rolebinding
  namespace: webapps
roleRef:
  apiGroup: rbac.authorization.k8s.io
  kind: Role
  name: app-role
subjects:
- namespace: webapps
  kind: ServiceAccount
  name: jenkins
kubectl -f apply bind.yml
Now role is bind to the svc account.
Our service account Jenkins got the permissions now with help of role file.
But for using the service account for deployment we need the token for the service account which will be used for the authentication. And authentication will be made by Kube-API-Server.
We will perform all the deployments with our service account. The first file we have created svc.yml
Creating a Token for the Service Account used for Authentication
To generate the token, follow these steps:
Click on the "Create Token" link, which will redirect you to the Kubernetes documentation page.
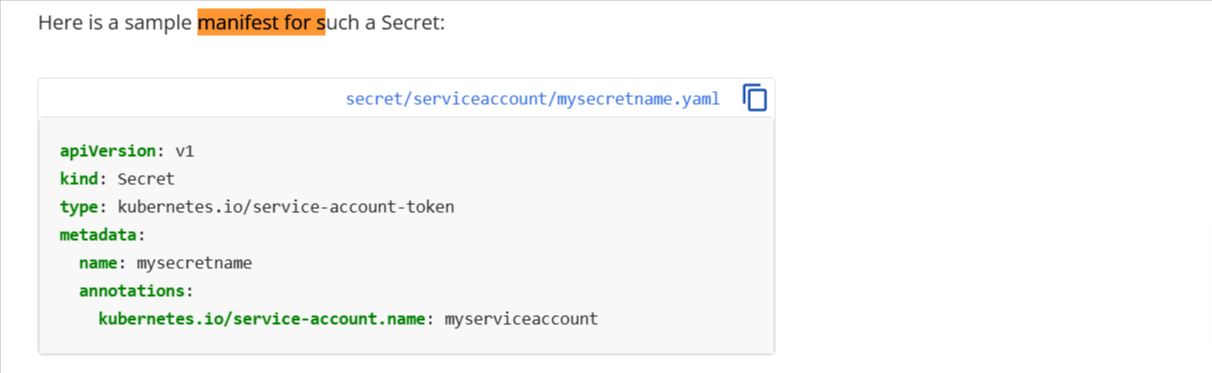
There, you will find a YAML file that helps in creating the Service Account Secret.
Copy the YAML content and create a new file named
sec.yamlin your local environment.Open the file and ensure that the Service Account Name matches the one you created earlier. For example, if you created a Service Account named "Jenkins", update the YAML accordingly.
vim sec.ymlapiVersion: v1 kind: Secret type: kubernetes.io/service-account-token metadata: name: mysecretname annotations: kubernetes.io/service-account.name: jenkinsApply the YAML file to create the secret:
kubectl apply -f sec.yml -n webappsSince the namespace is not mentioned in the YAML file, we need to specify it explicitly using
-n webapps.
Retrieving the Token from the Secret
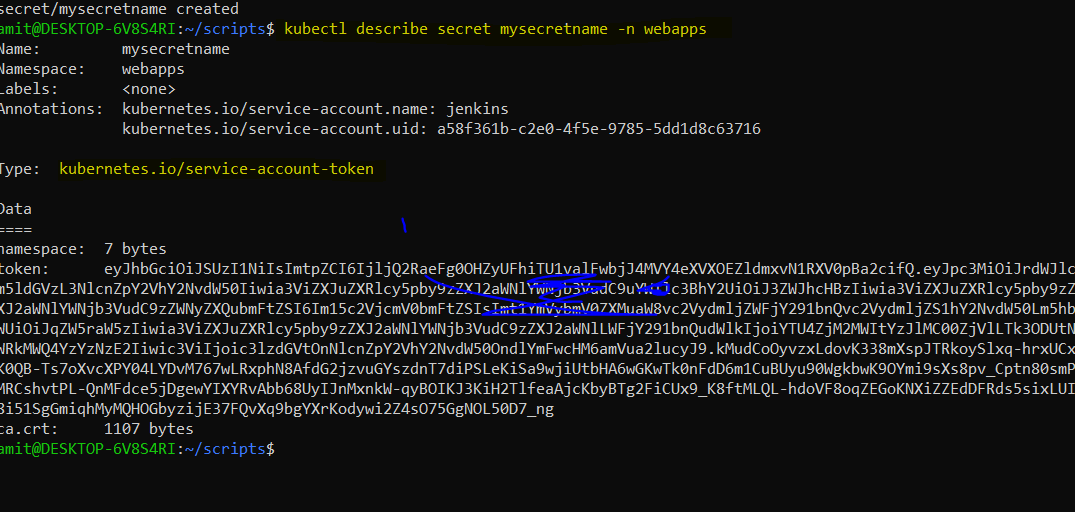
Once the secret is created, retrieve the token using the following command:
#kubectl describe secret <SECRET_NAME> -n webapps
kubectl describe secret mysecretname -n webapps
Copy the token from the output and store it securely, as we will use it in Jenkins for authentication.
Configuring Jenkins for Deployment - CD part
Now, let’s set up our Continuous Deployment (CD) pipeline in Jenkins.
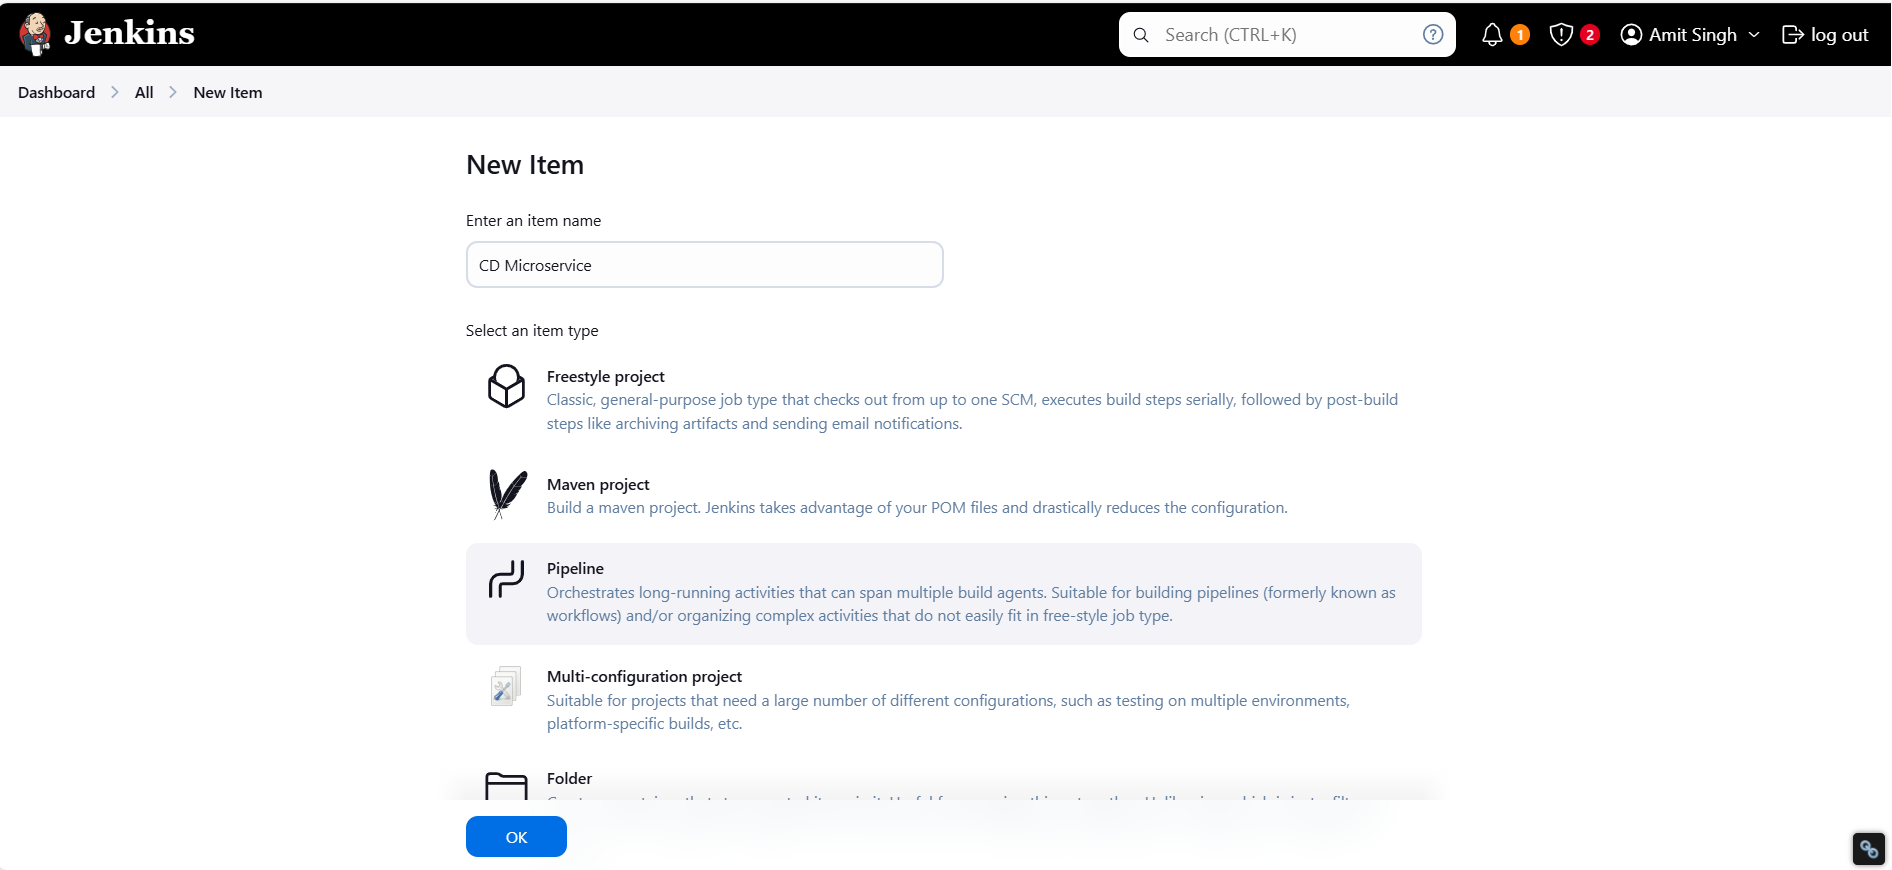
1. Creating a New Pipeline
Navigate to Jenkins Dashboard → New Item.
Select Pipeline, give it a name, and click OK.
Start by creating a CD pipeline to test the setup.
2. Adding Kubernetes CLI in Jenkins
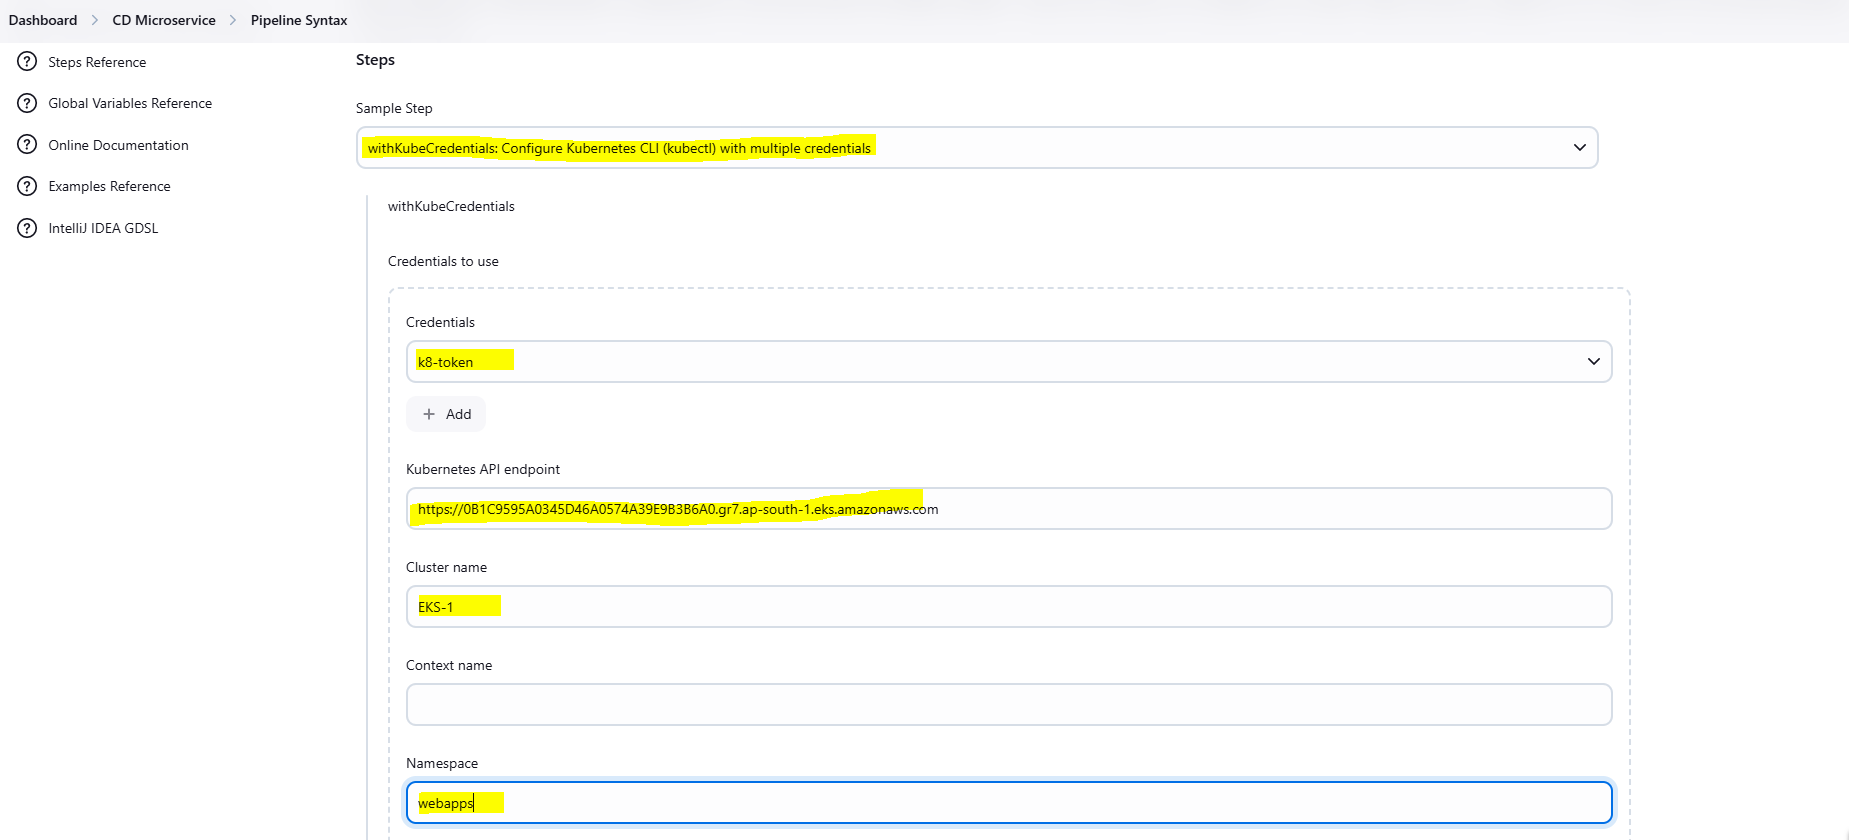
While configuring stage, our first stage will be “Deploy to kuberentes” and this will be generated with help of Pipeline syntax generator.
Open Pipeline Syntax Generator in Jenkins.
Look for the option "Configure Kubernetes CLI".
Click on "Add Credentials" → Select "Secret Text".
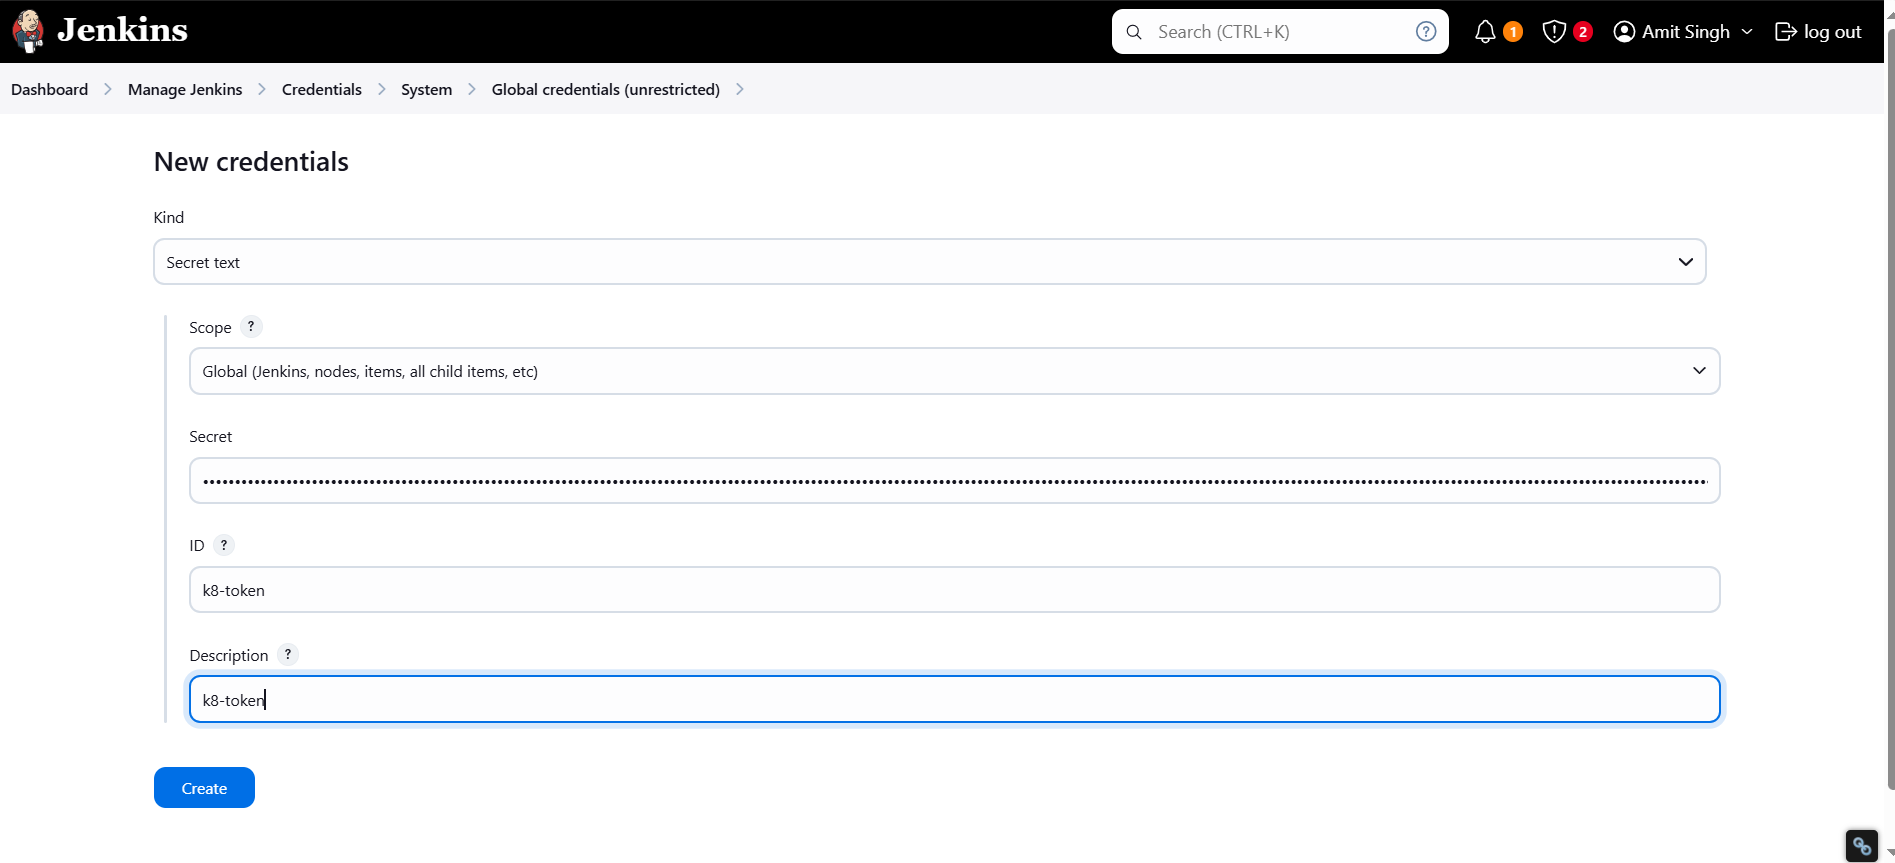
Paste the token generated earlier and give it an ID (e.g.,
k8-token).Enter the Kubernetes API Endpoint from the EKS cluster overview.

Set the Cluster Name (e.g.,
eks-1) and the Namespace (web-apps).Generate the Jenkins pipeline script and insert it into your pipeline configuration.
Step 4: Writing the Jenkinsfile for Deployment
Now, let's define our deployment pipeline inside a Jenkinsfile stored in the Git repository.
pipeline {
agent any
stages {
stage('Deploy to Kubernetes') {
steps {
withKubeCredentials(kubectlCredentials: [[
caCertificate: '',
clusterName: 'EKS-1',
contextName: '',
credentialsId: 'k8-token',
namespace: 'webapps',
serverUrl: 'https://0B1C9595A0345D46A0574A39E9B3B6A0.gr7.ap-south-1.eks.amazonaws.com'
]]) {
sh 'kubectl apply -f deployment-service.yml' // our main branch file
}
}
}
stage('Verify deployment') {
steps {
withKubeCredentials(kubectlCredentials: [[
caCertificate: '',
clusterName: 'EKS-1',
contextName: '',
credentialsId: 'k8-token',
namespace: 'webapps',
serverUrl: 'https://0B1C9595A0345D46A0574A39E9B3B6A0.gr7.ap-south-1.eks.amazonaws.com'
]]) {
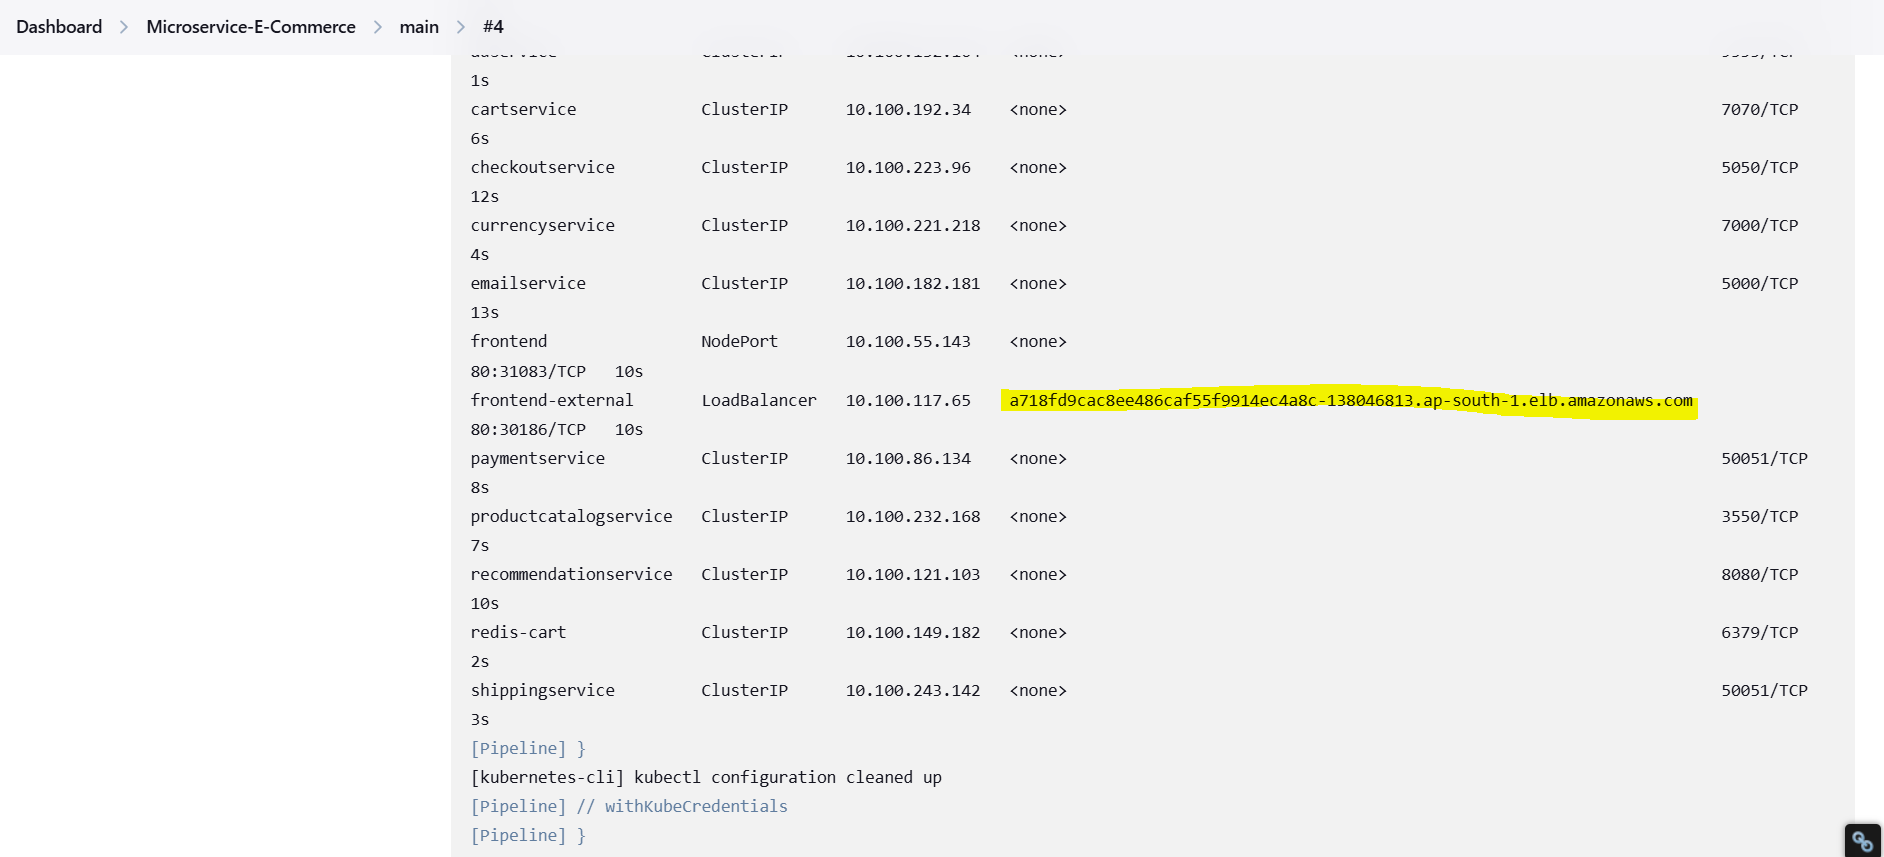
sh 'kubectl get svc -n webapps'
}
}
}
}
}
Since we have generated our Jenkinsfile with help of pipeline syntax generator. Copy that file and paste to our mainbranch > Jenkinsfile
Committing the Jenkinsfile to the main branch Repository
Save the
Jenkinsfileinside your Git repository.Commit and push the changes:
 git add Jenkinsfile
 git commit -m "Added CI/CD pipeline for Kubernetes deployment"
 git push origin main
Jenkins will automatically detect the new pipeline and start executing it.
Accessing the Deployed Application
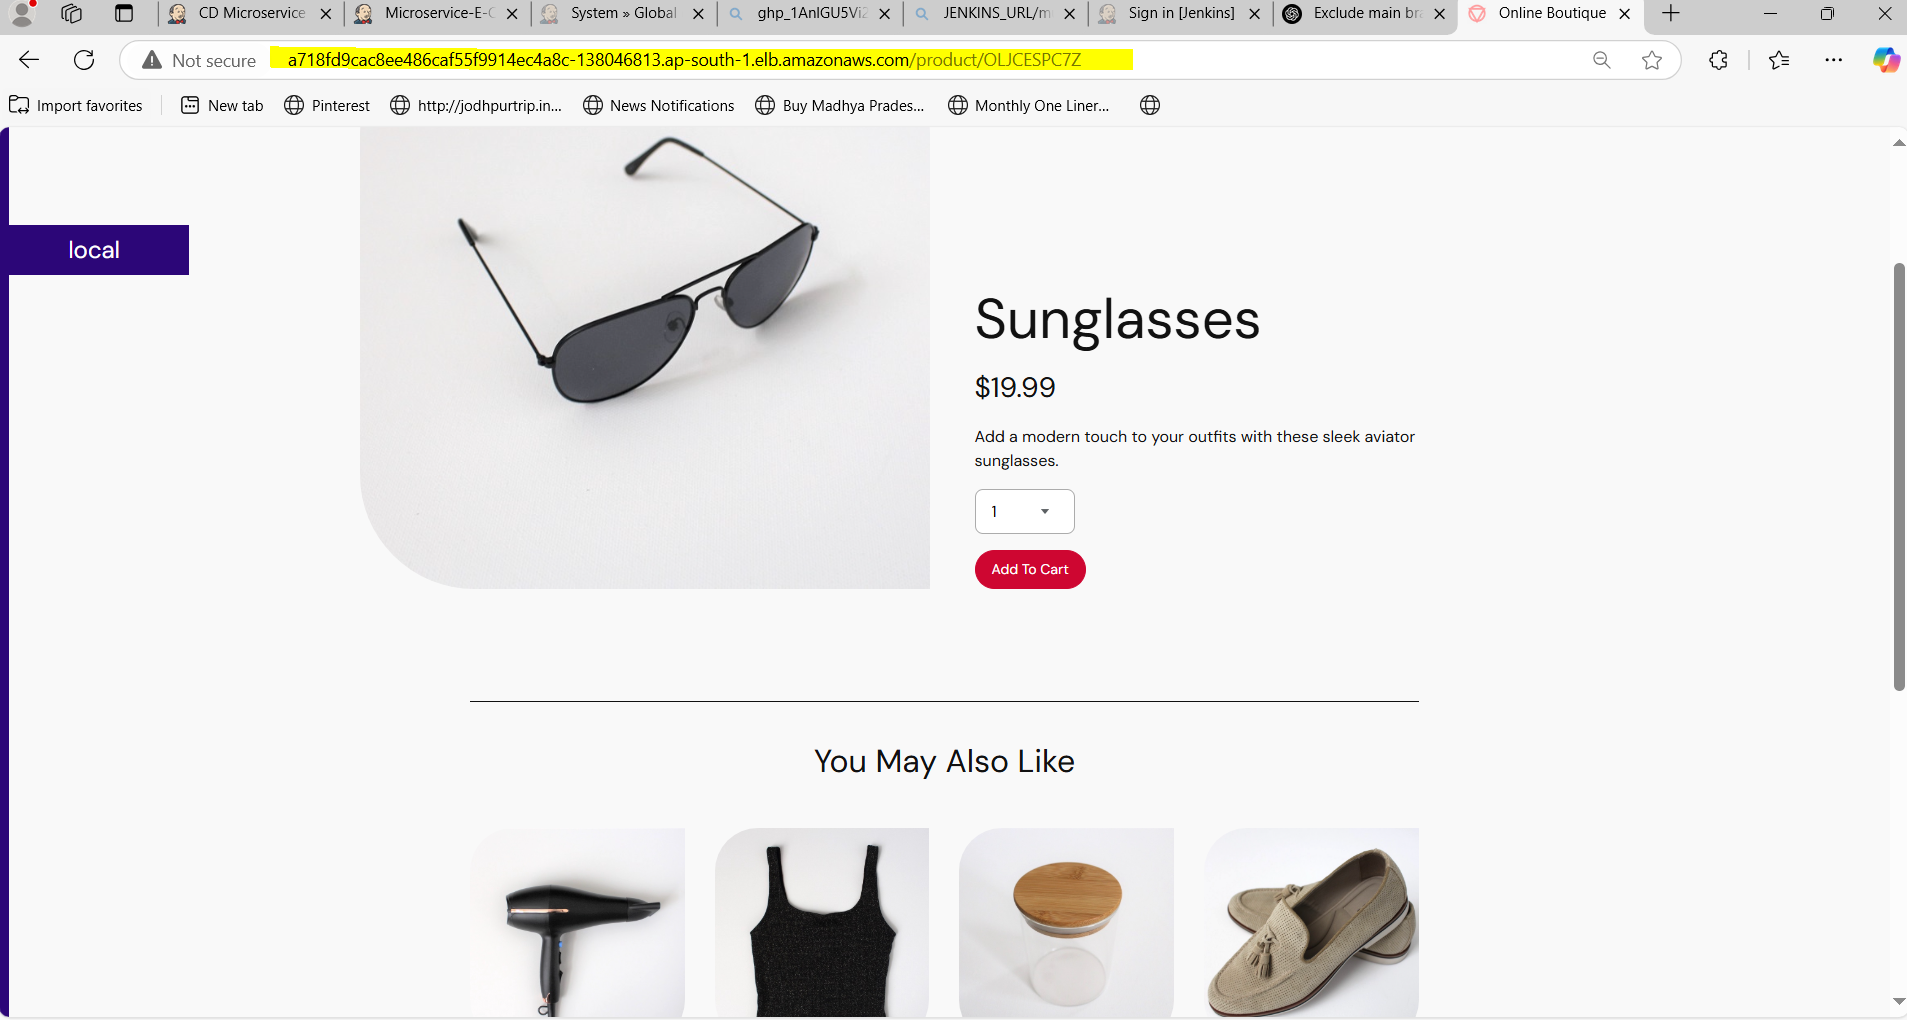
Once the pipeline runs successfully, retrieve the LoadBalancer URL:
kubectl get svc -n webapps
Use the external URL to access your deployed application.


Cleaning Up the Cluster
After deployment and testing, delete the Kubernetes cluster to free up resources:
eksctl delete cluster --name EKS-1 --region ap-south-1
DONE
We have successfully:
✅ Created a Service Account with necessary permissions.
✅ Generated a token for authentication.
✅ Configured Jenkins CI/CD Pipeline for Kubernetes deployment.
✅ Deployed 11 microservices using Kubernetes and Jenkins.
✅ Verified the deployment by fetching service details.


