Deep Dive in Git & GitHub for DevOps Engineers
Day 12 Task: Git and GitHub are essential tools for DevOps Engineers. I’ll write in brief about these concepts in easy and friendly language to understand the importance and depth.
What is Git and Why is it Important?
Git is distributed version control system that helps to track changes of file, example source code. It makes our rollbacks simple, we can save the checkpoint and go to that particular previous version, collaborate with other developers and avoid file losses
Why is it so important?
Collaboration: We can work with other devs on same project by creating separate branches without overriding each other’s work
Tracking Changes: It keeps a history of every change made to a project, including who made the change and why.
Branching & Merging: We can work in our own branch and after that final output we can merge them in a single codebase
Backup: Git works as a secure backup option because the File System of any O.S dosen’t provide recovery and backup facility this easy.
Difference Between Main Branch and Master Branch
The terms "Main" and "Master" branch are often used interchangeably in Git, but there’s a subtle difference.
Master Branch
In previous days, the master branch has been the default branch in Git repositories. While moving things to live in production we use the main/master branch also called “main line of development”
Main Branch
Main branch is simply a new name for master branch. Both work as same purpose main/master. The older version of git followed master branch but the newer version of Git and Github are following the main branch name as “default”. Because of some conflict in USA they changed the name master to main.
So, what's the difference? Functionally, they are the same. The real change is in naming conventions.
Can you explain the difference between Git and GitHub?
Git:
Git is a version control system “VCS” that works locally on your machine. It helps to track changes to developers code, manage versions, and collaborate with others developers offline, this is main benefit.
With Git, you can commit, branch, and merge changes on your local machine then push to github.
GitHub:
GitHub is a online/remote platform that hosts Git repositories remotely. It's where you push your local code changes to share with your team or to other collaborators.
It adds features like issue tracking, pull requests, and collaborative tools.
While Git is essential for tracking code changes, GitHub is where that code is shared and collaborated upon on a broader scale.
Git is your local tool for managing code; GitHub is where you collaborate with other developers and store your repositories remotely.
How to Create a New Repository on GitHub

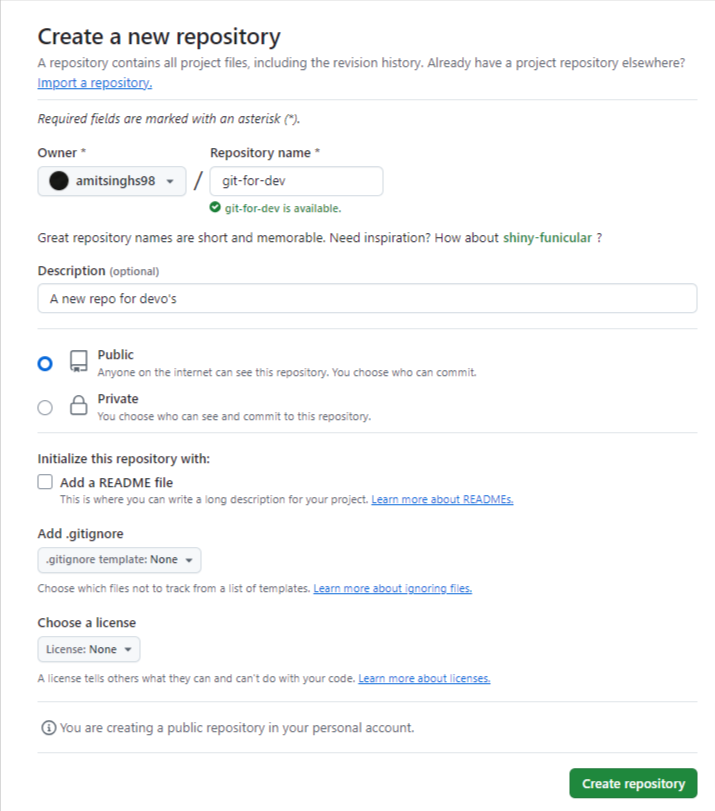
Creating a new repository on GitHub is a simple process. Check:
Sign in to your GitHub account.
On the homepage, click the "+" icon in the upper-right corner and select "New repository."
Choose a repository name and, optionally, a description.
Decide whether the repository will be public (anyone can see it) or private (only specific people can access it).
(Optional) Add a README file, which provides an overview of your project.
Click "Create repository."
Once created, GitHub provides you with a repository URL that you can clone locally.
Difference between Local vs Remote Repositories
Local Repository:
A local repository is the Git repository stored on your local machine. It contains all the project’s history, branches, and changes. You can create branches, make commits, and merge them locally.
Remote Repository:
A remote repository is the repository hosted on platforms like GitHub online. It serves as the centralized version of your project that other collaborators can access, or where you back up your code.
How to Connect a Local Repository to a Remote Repository:
After creating a repository on GitHub, you’ll want to link your local repository with the remote one. Here's how you can do it:
Navigate to your local project directory: ex: git-for-devops
cd git-for-devopsInitialize Git (if you haven’t already):
git initAdd the remote repository:
git remote add origin https://github.com/your-username/your-repo-name.git- This command connects your local Git project to the remote GitHub repository.
Verify the remote connection:
git remote -vTells on which repo we are pointing towards
Push your local changes to GitHub:
git push -u origin mainNow, your local project is synced with your remote GitHub repository. Any future changes can be pushed using
git push, and you can also pull updates from GitHub usinggit pull.
Tasks
Task 1: Set your user name and email address, which will be associated with your commits.
We can set username and email locally to our specific repo or do it globally
Globally
git config --global user.name "Your Name" git config --global user.email "youremail@example.com"
Locally: We avoid the —global keyword
git config user.name "Your Name" git config user.email "youremail@example.com"
If you only want to configure it for a specific repository, omit the --global option:
Task 2: Create a repository named "DevOps" on GitHub.

Task 2: Connect your local repository to the repository on GitHub.

Connected to local repo with ssh keygen.
Task 2: Create a new file in Devops/Git/Day-02.txt & add some content to it.

Task 2: Push your local commits to the repository on GitHub.

Pushed the local commits over github.